

Barret
Thursday, November 30, 2017 | 7 minutes
Deploy Database Updates With FluentMigrator and VSTS
One extremely handy open source library for .NET developers is FluentMigrator. This package allows you to script out your database changes as C# classes. The concept is similar to the code first migrations of EntityFramework, but allows you a bit more fine tuned control over deployments and doesn’t tie you to any specific ORM or other database interaction model. For example, it’s easy to control which environments the updates go to with tagging. This can help prevent accidental database updates to production and has already saved me from database restores on a couple of occasions.
Note: While FluentMigrator works great for .NET up through 4.7, it is not currently officially supported for .NET Core or .NET Standard. Some devs have reported that it works fine in their use cases with a couple of warnings. Just be aware that this is the state currently. I have come across a package called Serenity.FluentMigrator that states it is a temporary .NET Core port of FluentMigrator, but I have not tested it as yet and certainly wouldn’t count on something that calls itself temporary anyway.
Project Setup
Create a new .NET class library and add the FluentMigrator NuGet package (currently version 1.6.2).
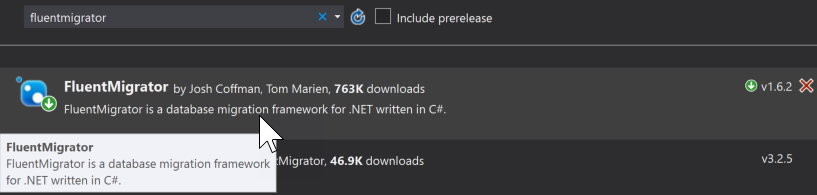
FluentMigrator
NuGet
There are a couple of ways to execute the migrations once they are created. For this post, we’re going to use the Migrate.exe executable included with the NuGet package from the command line. Let’s add a reference to that to ensure it gets included and deployed with the solution later. Select “Add Reference” from the References context menu and then “Browse”. Browse to the FluentMigrator.1.6.2 folder under packages for your solution. In a subfolder named “tools”, you will find Migrate.exe. Select it and click “Add”, then “OK” to add the reference.
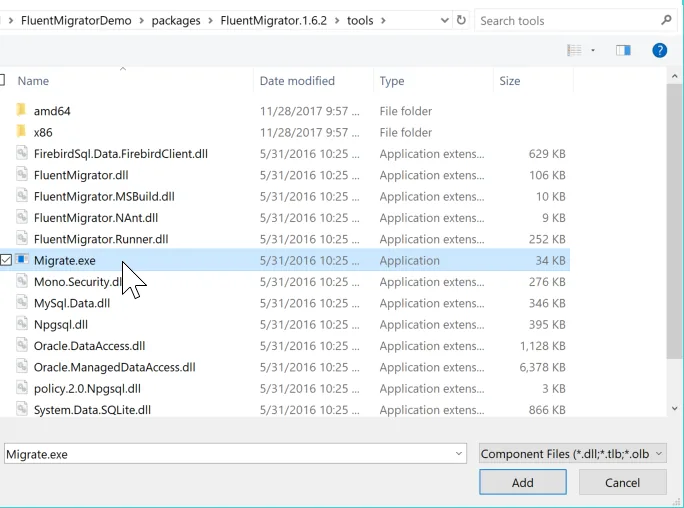
FluentMigrator-Migrate
FluentMigrator Migrate.exe
Each update to your database is implemented as a Migration. Migrations are C# classes that inherit from the FluentMigrator.Migration class. If you’ve worked with Entity Framework, they will feel very familiar. There are 4 things that are absolutely required in a Migration class, plus a number of optional features that make life easier. For this post, we’ll just go over what’s required.
Inheritance
The class must inherit from the FluentMigrator.Migration class. Add a “using FluentMigrator;” to the top and then add your inheritance after the class name.
Migration Attribute
The class must be tagged with the [Migration(##NUMBER##)] attribute. The number in the parentheses indicates the order in which the migration is applied to the database. In order to avoid confusion and perhaps allow for filling migrations in between others later, most people use a number that represents the date and time the class was created. Something along the lines of YYYYMMDDhhmm is common. So if I were to create migration class on November 29, 2017 at 10:30 AM, the number I would probably use would be 201711291030.
You can, of course, use a sequential format of 1, 2, 3, etc. The problem with this is that if you find you have to move a migration to a different place in the order, you have to re-number one or more other migrations as well. Whatever format you choose, stick to it and make sure everyone on your team follows it.
There are two important rules with the numbering. First, no two migrations should have the same number. If there are duplicates, only one of those migrations will ever be applied. Second, once a migration has been applied to the database, do not change its number. If you need to change something about that migration, create a new migration that alters what was processed earlier. If you change a migration’s number post application, it will try to run that migration again, usually throwing an error because it’s changes have already been applied to the database.
Up Function
As with Entity Framework, there are two required functions in your Migration class. The first is the Up function. This is the code that is processed when a Migration is applied to the database. Here is where you write the code to create or alter a table or other database functionality. If you don’t alter it, the Up function is processed as a single transaction. If it fails, none of the changes from the Up function stay applied.
There’s a lot you can do here and we’ll leave that to another post or you can review the documentation on the FluentMigrator wiki.
Down Function
If you run a rollback, this is the code that will be run. You should be sure to write code that undoes everything you did in the Up function, but in reverse order. For example, if you created a table and added two foreign keys to it in the Up function, you would delete the foreign keys, then the table itself in the Down function
Example Migration Class
using System.Data;using FluentMigrator;
namespace FluentMigratorDemo.Schema
{
    [Migration(201711272109)]
    public class _201711272109_AddTable_MySampleTable : Migration
    {
        public override void Up()
        {
            Create.Table("MySampleTable")
                .WithColumn("Id").AsGuid().NotNullable().PrimaryKey().WithDefaultValue(SystemMethods.NewGuid)
                .WithColumn("DivisionId").AsGuid().Nullable()
                .WithColumn("FirstName").AsString(25).NotNullable()
                .WithColumn("LastName").AsString(50).NotNullable()
                .WithColumn("MiddleName").AsString(25).Nullable()
                .WithColumn("Added").AsDateTime().WithDefaultValue(SystemMethods.CurrentUTCDateTime);
            Create.ForeignKey("FK_MySampleTable_Division")
                .FromTable("MySampleTable")
                .ForeignColumn("DivisionId")
                .ToTable("Division")
                .PrimaryColumn("Id")
                .OnDeleteOrUpdate(Rule.Cascade);
        }
        public override void Down()
        {
            Delete.ForeignKey("FK_MySampleTable_Division").OnTable("MySampleTable");
            Delete.Table("MySampleTable");
        }
    }
}
PowerShell Scripts
Since we’re using the Migrate.exe executable to run the migrations, we’ll set up a pair of PowerShell scripts to run the Up and Down calls. Create two blank scripts and add them to your solution. I generally put mine in a solution folder called Migrations, but it doesn’t matter where.
Into your “Up” script, put something like the following:
C:projectsFluentMigratorDemoFluentMigratorDemobinDebugMigrate.exe /conn "Data Source=.SQLSERVER16;Initial Catalog=FluentMigratorDemo;User Id=ssuser;Password=test" -db sqlserver2012 -a "C:projectsFluentMigratorDemoFluentMigratorDemobinDebugFluentMigratorDemo.dll" -t migrate --tag local --timeout 300
Into your “Down/Rollback” script, put something like the following:
param([Int32]$steps=0)
If($steps -eq 0)
{
    C:projectsFluentMigratorDemoFluentMigratorDemobinDebugMigrate.exe /conn "Data Source=.SQLSERVER16;Initial Catalog=FluentMigratorDemo;User Id=ssuser;Password=test" -db sqlserver2012 -a "C:projectsFluentMigratorDemoFluentMigratorDemobinDebugFluentMigratorDemo.dll" -t rollback:all --tag local --timeout 300
}
Else
{
C:projectsFluentMigratorDemoFluentMigratorDemobinDebugMigrate.exe /conn "Data Source=.SQLSERVER16;Initial Catalog=FluentMigratorDemo;User Id=ssuser;Password=test" -db sqlserver2012 -a "C:projectsFluentMigratorDemoFluentMigratorDemobinDebugFluentMigratorDemo.dll" -t rollback --steps $steps --tag local --timeout 300
}
Now let’s go over each of those pieces:
- The first part is the path to the Migrate.exe executable we added later. This should be your build output directory from Visual Studio or whatever build tool you’re using.
- /conn is the database connection string
- -db tells it what kind of database you’re connecting to. For MS SQL Server you pass “sqlserver2012”, which covers any SQL Server version from 2012 on at the moment.
- -a points to the location of the class library DLL the project outputs
- -t is the type of migration.“migrate” tells it to apply any unapplied Up migrations"rollback" tells it to run the Down migrations to perform rollbacks. With rollback, there are a couple of options. With “rollback:all”, it rolls all migrations back in reverse order to the very beginning. With “rollback –steps ##NUMBER##”, it will rollback the last X number of migrations equal to number that follows the –steps parameter. You can see in the rollback PowerShell script above, I created it so you can pass in the number of migrations to roll back.
- --tag tells the migration process which migrations to apply/rollback. I haven’t covered tags, but the short version is this.All eligible migrations that are not tagged will always run regardless of the tag passed in. If a migration doesn’t have a tag attached, it will run if it hasn’t run previously.Only those tagged migrations that match the passed in tag will run. If you tag a migration “dev” and you pass in the tag “prod”, the migration will not run
- --timeout overrides the default timeout in seconds. I believe this is a per migration timeout. So if you pass in 300, each migration has 300 seconds to run or it will timeout and rollback.
One last note on the local part of this. Always run a build before you call the migration script. It’s running migrations it finds in the DLL file from the class library. If you haven’t run your build, it won’t be there.
Visual Studio Team Services
Okay, we’ve got our migrations project ready. Let’s set up VSTS to migrate our code. Set up your Build process as normal. Immediately after your solution build step, add a Command Line step from the Utility list. Assuming you left things at their defaults in the previous build steps, you can set the following parameters:
- Tool: Set this to point to the location of the Migrate.exe file. In our example, it would be $(Build.SourcesDirectory)FluentMigratorDemobindebugMigrate.exe
- Arguments: Everything that was after the Migrate.exe in your PowerShell script goes here, starting with “/conn…”. Be sure to update the database connection string as appropriate for what your build target is.
That’s it! All the hard stuff was done locally. Here you’re just copying over. In another post I’ll go into more depth on tagging and some of the features and gotchas for writing migrations with FluentMigrator.
