

Barret
Friday, December 21, 2018 | 3 minutes
Microsoft Flow - Adding Some Delay
In a previous post, I walked through saving tweets to an Azure table so they could be retweeted later with an #ICYMI tag. As with most processes of learning, we do the hard way first to learn the concepts. And then we learn the easier ways to do it. As it so happens, Flow provides a much easier way to do this. We’re going to add some delay.
One of the Actions available in Flow is the Delay Action. This pauses the execution of a Flow for whatever amount of time you specify. So instead of saving our tweet to a storage table, we’re going to replace that part of the Flow with a delay and a tweet post after the delay.
The Existing Flow
Go back to the My Flows screen and select the Flow we created originally. You can either edit the existing Flow or make a copy of it and edit that one. If you make a copy, make sure you disable one of them, otherwise Twitter will throw errors when the second Flow to run tries to post the exact same tweet the first Flow posted. (NOTE: Posting to Twitter no longer works. Check my YouTube channel for videos on posting to BlueSky and Mastodon)
Our original Flow looked something like this:
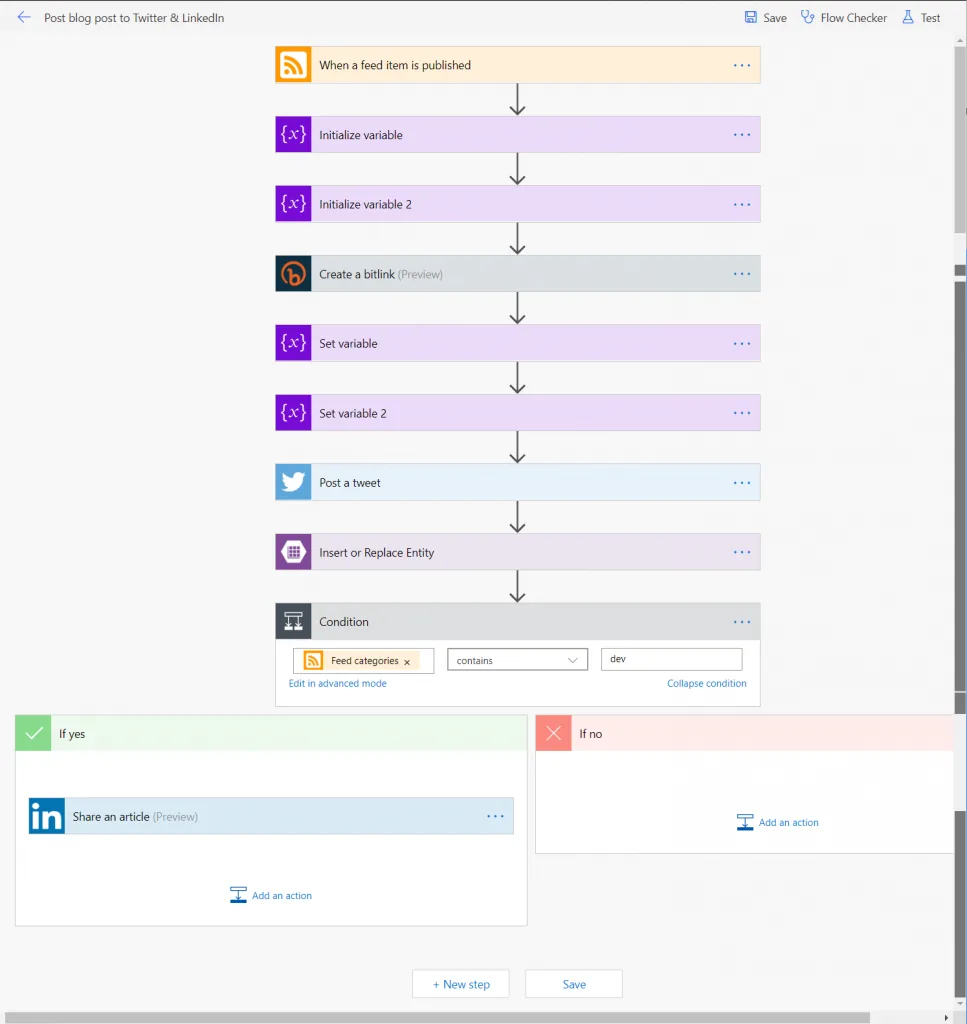
Image of existing flow
Let’s start by deleting the following steps:
Insert or Replace Entity - this is the step that saves the JSON object to the Azure Table Storage
Set variable 2 - this is the step that builds the JSON object to be saved to the Azure Table Storage
Initialize variable 2 - the step that defines our JSON object
They have to be deleted in that order. Flow has some good error checking and usually won’t let you delete a step that a step further down depends on.
Add Some Delay
Now we’re going add in Delay. At the very bottom of our Flow, click on “New step” and type delay into the search box. You should see two Actions to choose from: “Delay” and “Delay until”.
The “Delay” Action pauses the execution for a specified amount of time. The “Delay until” Action pauses the execution until a specific date. For example, you want your Flow to wait until January 2nd, 2020 at 12:30AM. We want to wait for a few hours, so we’re going to select the “Delay” Action.
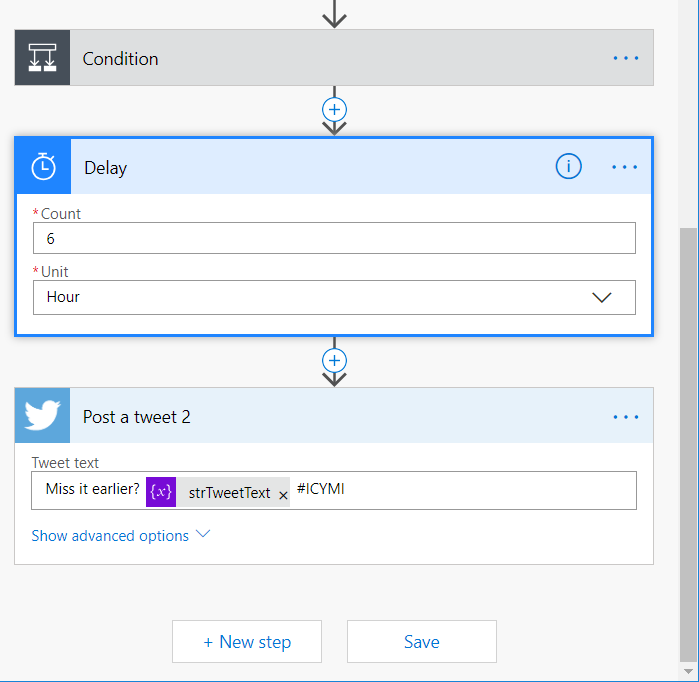
There are two parameters for the Delay Action, Count and Unit. Unit can be any type of time span from second up through month. And count is the number of that time span to wait. We’re going to enter 6 and “hour” respectively. That’s all we need for the Delay.
Next, let’s add a new step at the bottom. Select the Twitter “Post a tweet” Action. In the “Tweet text” parameter, put your tweet text variable and then add some text before and/or after it, such as an #ICYMI hashtag. Whatever you want to do. Just make sure it’s not the exact same as the original tweet text or Twitter will most likely reject the tweet. Do that kind of thing enough times and they’ll lock out your account.
The bottom of our Flow should now look something like this:
Adding the missed it tweet
Lastly, let’s save our updated Flow and then turn off the other Flow that we created which runs the ICYMI process. Since we’re handling it all in the primary Flow, it won’t be needed anymore.
Fin
That’s it! We’ve simplified one Flow and eliminated the need for another one. We’re making our lives easier, one Action at a time.
