
Barret
Monday, November 26, 2018 | 6 minutes
Microsoft Flow - ICYMI, the Easier Way
(NOTE: Posting to Twitter no longer works. Check my YouTube channel for videos on posting to Bluesky and Mastodon)
Last time I walked through a more complex way to implement a roll your own ‘In Case You Missed It’ Flow for retweeting Twitter posts linking to new blog articles. It wasn’t the way I would do it, but the point was more to show you a few things you can do in Microsoft Flow.
This time I’m going to show you an easier way to retweet posts to Twitter about your blog. And this time we’re going to use Azure Table Storage to make our lives easier.
Azure Table Storage
The first thing we’ll need to do is to create our Azure Storage account table. Table Storage is a great way to store simple tables of data in an extremely fast and light method. For our purpose here, we need a table to store the text of our original tweet and a timestamp of when we posted the tweet.
Azure Storage Account
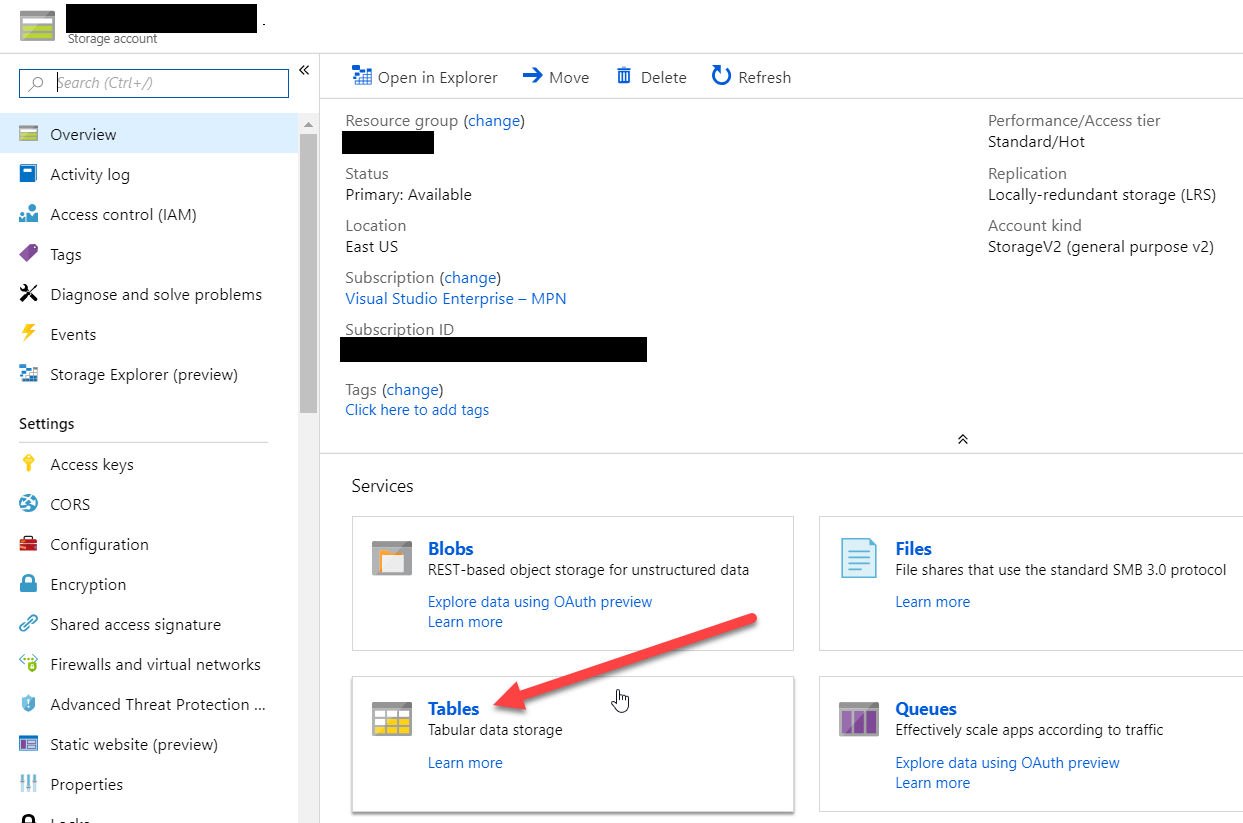
Under your Azure account, either create a new Azure Storage account or open an existing Storage account where you want to store this table. On the Overview tab, click on the Tables block to open your list of tables.
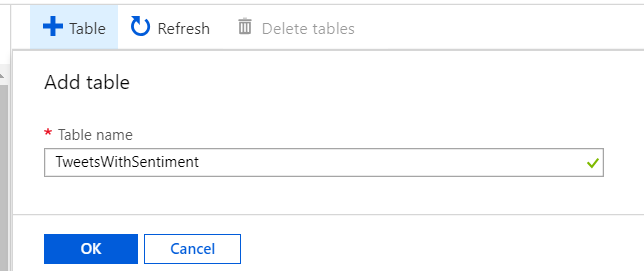
On the Tables page, click the Add Table button at the top.
Azure Storage - Create Table
Enter a name for the table. I’m going to call my table Tweets. If you have not previously connected this Azure Storage account to Flow, you will need to keep a couple of pieces of information handy for the next step.
The first thing you will need is the name of the Storage account. This can be found in the URL of the table you just created. It will be the first part that comes after the https:// part. Something along the lines of:
https://[[STORAGEACCOUNTNAME]].table.core.windows.net
The second thing you will need is an access key. You can find these by clicking on the Access keys menu option from the left menu of your storage account page.
Update Your Posting Flow
The next step is to edit the Flow that posts your original tweet so that it stores the text and timestamp for later retrieval.
The first thing we will need to do is define a new string variable and set it’s value to be equal to the text we are posting to the tweet. This will make the next step easier. So at the top, insert a new “Initialize variable” Action. Give it a name and set its type as string.
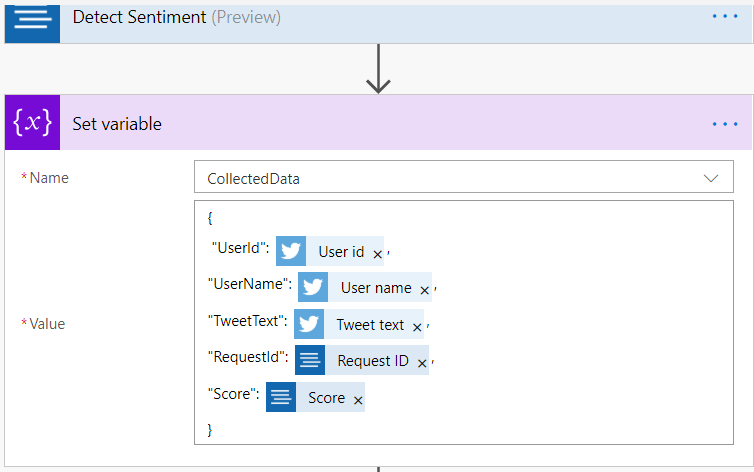
Now, in between the Bit.ly Action and the Twitter Action, we need to insert a “Set variable” action. Copy the text from the “Post a tweet” Action as the value for the variable and replace the value in the Twitter Action with the variable name. You can also remove the #blog hashtag we added in the last blog post. Your Flow should now look something like this:
Set a variable
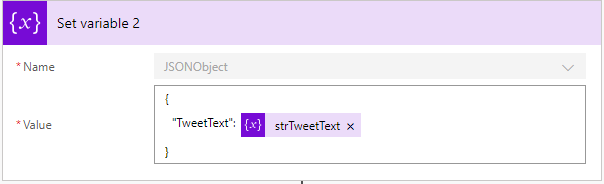
The next thing we need to do is create our JSON object to be stored in the table storage. At the top, add another “Initialize variable” action and set its type to Object. Just after the “Post a tweet” Action add another Action. Again select “Set variable” as the action. We will set its value as shown below:
Set JSON Object
Search for Azure Table Storage and select “Insert or Replace Entity” from the actions list that comes up. If you have not previously connected your Azure Storage account, a dialog will ask for the parameters:
- Connector name: The name you want to give this new Connector
- Storage account name: The name of your Azure Storage account from above
- Key: The access key for your Azure Storage account from above
Once you have done that, you can set the parameters of the “Insert or Replace Entity” Action. For Table, select the table name you created in Azure Storage. For “Partition Key”, I used the “Feed ID” output from the RSS feed. For “Row Key”, I am using the “Tweet id” that was returned from the “Post a tweet” action. And for “Entity”, we will use the JSON variable we just set.
Now save and either test it, or wait for the next successful run. You have to be careful with testing, as Twitter throws errors when you try to tweet something you just tweeted with the exact same text.
Once it does, you can use a tool like the Azure Storage Explorer to look at the row(s) you have added to your Azure Storage Table.
The New ICYMI Flow
Now that we’re storing the values to our table, we can either rework the ICYMI Flow we created previously or create a brand new Flow. For this example, I’ll re-work the existing Flow instead of restarting from scratch. That’s going to be marginally easier.
Re-open the editor for the ICYMI Flow. Just after your Initialize variable Actions at the top of the Flow, add a new Action. Search for “Azure storage” and select the “Get entities” action. In the Table field, select the Tweets table you created. Next, click “Show advanced options”. As we don’t want to return the entire table, we’re going to specify the Filter Query. Change the “Filter Query” field to be as follows:
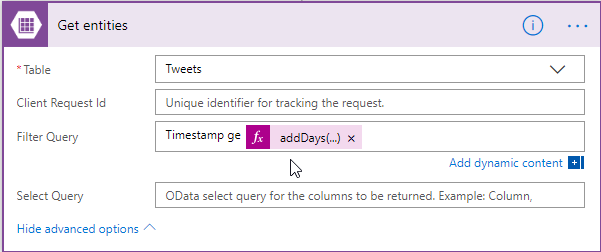
Get Table Records Last 24
The Expression that goes after “Timestamp ge " is:
concat('datetime''', addDays(utcNow(), -1), '''')
This is a standard ODATA query filter that will give us all table rows from the last 24 hours. That will be our working pool for the loop.
Next, we want to alter the “Apply to each” Action. Remove the “Body” value that came from our Twitter “Get user timeline” Action and replace it with the “Get entities result List of Entities” output.
concat(items('Apply_to_each')?['TweetText'], ' #ICYMI')
Next, we need to change the Set tweetText step within the loop to get the text from our entities instead of the tweets. In that Action, set the Value to the following Expression:
This will replace your previous “Add hashtag to text” Action that we added before.
Similarly, we will set our strTweetTime variable to also get it from the entities list. Set the Value in the “Set strTweetTime” Action to the following Expression:
items('Apply_to_each')?['Timestamp']
Next we can go ahead and delete our Twitter “Get user timeline” Action. It will no longer be needed. Because we’re no longer using a hashtag to track our blog post related tweets, we can also remove the second Condition Action we added to check for that hashtag. But before we do, drag the “Post a tweet” Action that is inside of that second Condition’s “If yes” pathway into the “If yes” pathway of the first Condition. Once you move that Action, go ahead and delete the second Condition Action.
The bottom of our Flow should now look like this:
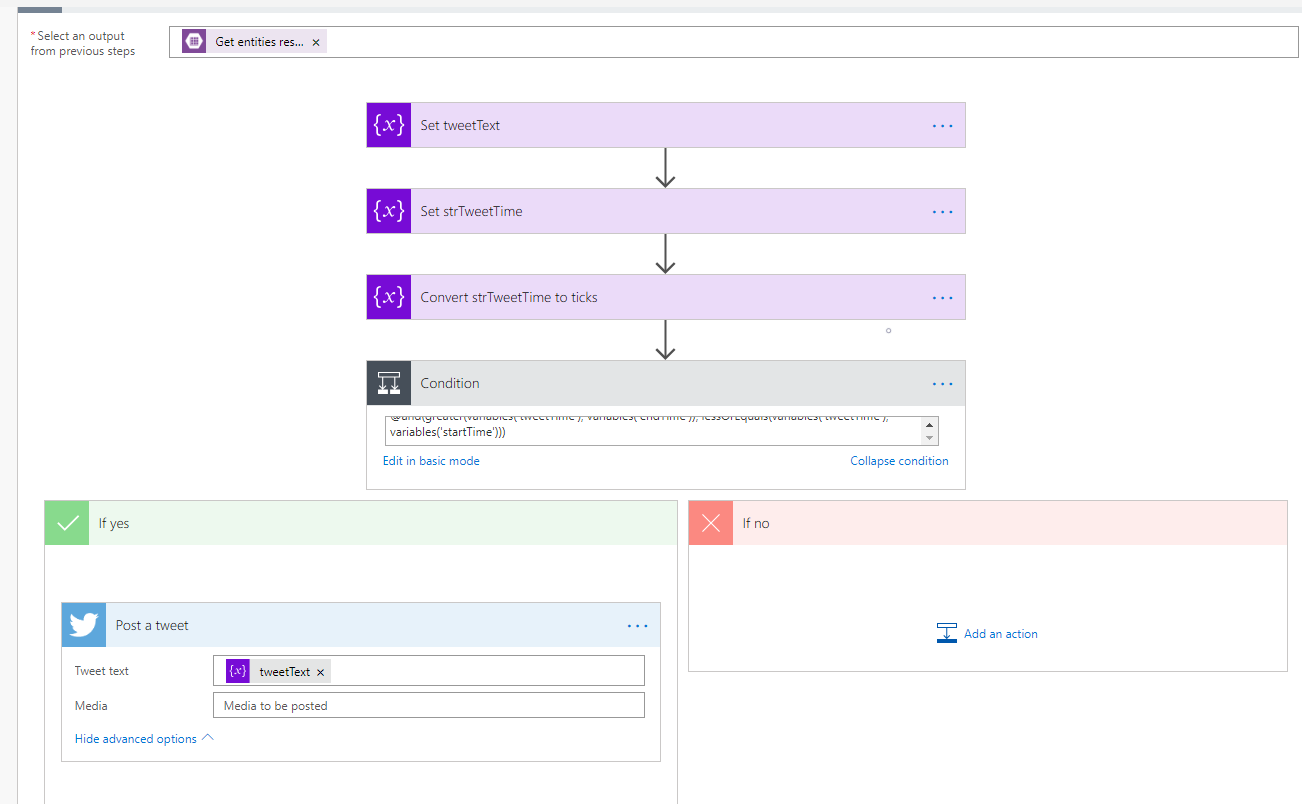
Bottom end of flow
Fin
And that’s it. Save your Flow and test it to make sure you haven’t added any bugs in your edits. You now have an easier method of tracking your blog post tweets.
