

Barret
Thursday, July 18, 2019 | 5 minutes
Microsoft Flow: Feeding Forms data to Dynamics 365 CRM
One of the most universal pieces of any company website is the “Contact Us” page. There are countless ways this is handled. At the simplest it can just open a mailto link. Sometimes there’s an inline form of some sort that feeds into some app somewhere. A lot of times it will require someone along the process to take the data from that form and copy/paste it into the whatever Customer Relationship Management system the company uses.
In this post, I’m going to show you how easy it is to use Microsoft Flow to automatically populate that data from whatever input form you’re using directly into your CRM. For this specific example we’re going to use Microsoft Forms for our input form and Microsoft Dynamics 365 as our CRM platform, but with all the various connectors available in Flow, it could easily swap out any number of input and endpoint platforms, such as Survey Monkey and SalesForce.
The Input Form
We’re using a simple form from Microsoft Forms for our input. With Forms you can either link to the form on their site via link or QR code, or put the form inline in your own HTML page.Our form will be 5 fields: First and last name, organization name, phone and email. Very simple.
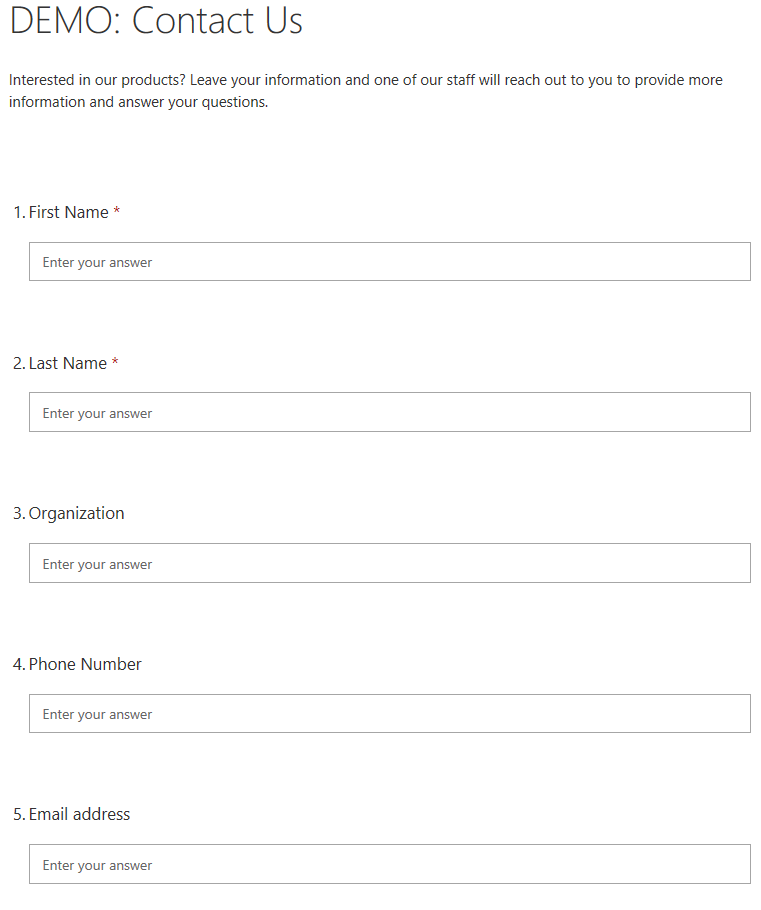
Our Form
The Flow
We’ll start with a blank flow. On your “My flows” tab in Microsoft Flow, select New -> Automated-from blank. “Automated” type flows are generally triggered by some external event. In this case, we’re going to trigger when a Forms entry is submitted.
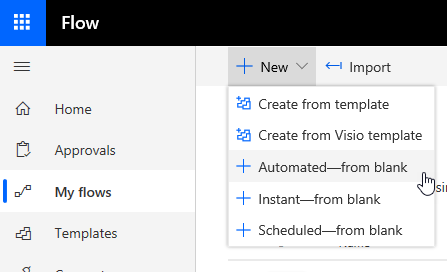
New-Automated
On the screen that pops up, enter a name for your flow and search the triggers for Microsoft Forms. On the list of triggers, select “When a new response is submitted” and click the Create button.
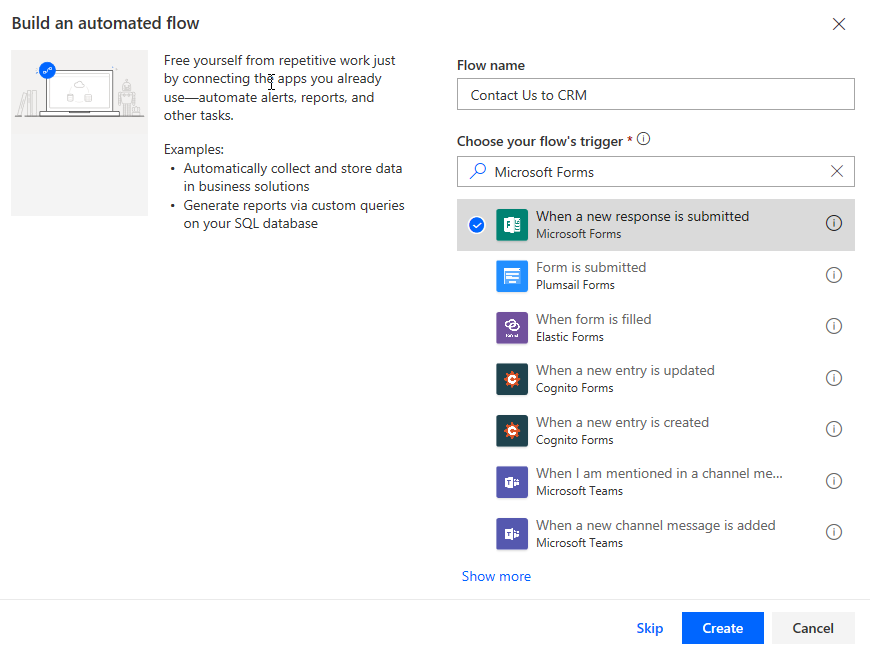
Create-form
If you haven’t already connected Microsoft Forms to Flow, you will be asked to enter your credentials for Forms to connect the two. Make sure the credentials you use has access to the input form you want to pull data from.
In the flow trigger step on the next screen, select the form from the drop down. Next, add a new step and search once more for Microsoft Forms. In the list that shows up, select “Get response details” and add that as the next step. In the Form Id field, select the form name once again. In the Response Id field, select “List of responses” from the trigger step.
When you select that, Flow will recognize that it is potentially a list of results and automatically surround the step with an “Apply to each” loop. Your flow should now look something like this:
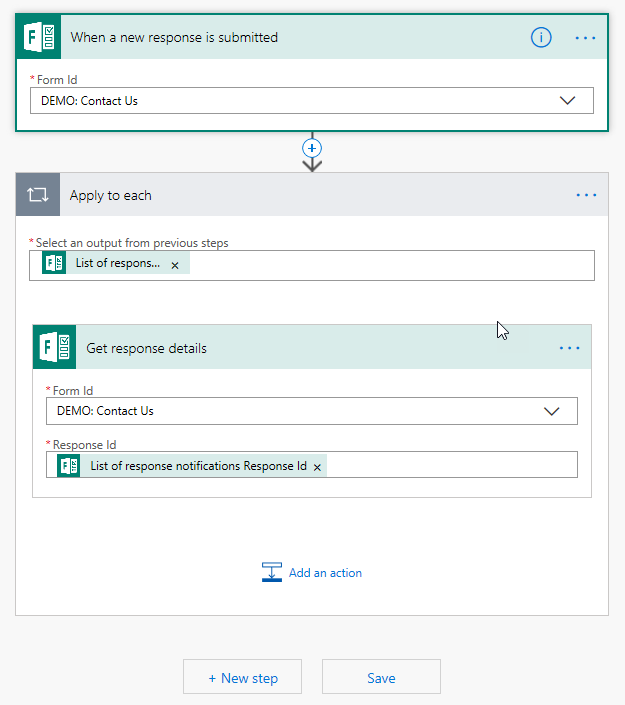
Flow-post-import
Output Record To CRM
The next step is export our data into the CRM of choice. In this case, we will use Microsoft Dynamics 365 for Sales, but it easily applies to any of the numerous CRM platforms Flow can connect to.
Inside the Apply to each loop, click “Add an action” at the bottom and search for “Dynamics”. You will see a number of options come up in the connectors list box. Select the one that says “Dynamics 365”. In the actions list, select “Create a new record”.
If you haven’t connected Flow to Dynamics 365 previously, you will be asked to enter valid credentials. As before, ensure the credentials you are using to connect Flow to Dynamics has the authority to access and add records to the Dynamics system.
In the “Create a new record” action, select the Organization Name for the D365 system you want to add records to and in the Entity Name box we’re going to select “Leads”. You will see a number of default fields appear, but you can click on “Show advanced options” at the bottom to show every field from the Leads entity.
In our case, everything we need is shown in the default list, so we will update the following fields with outputs from the “Get response details” action, as follows:
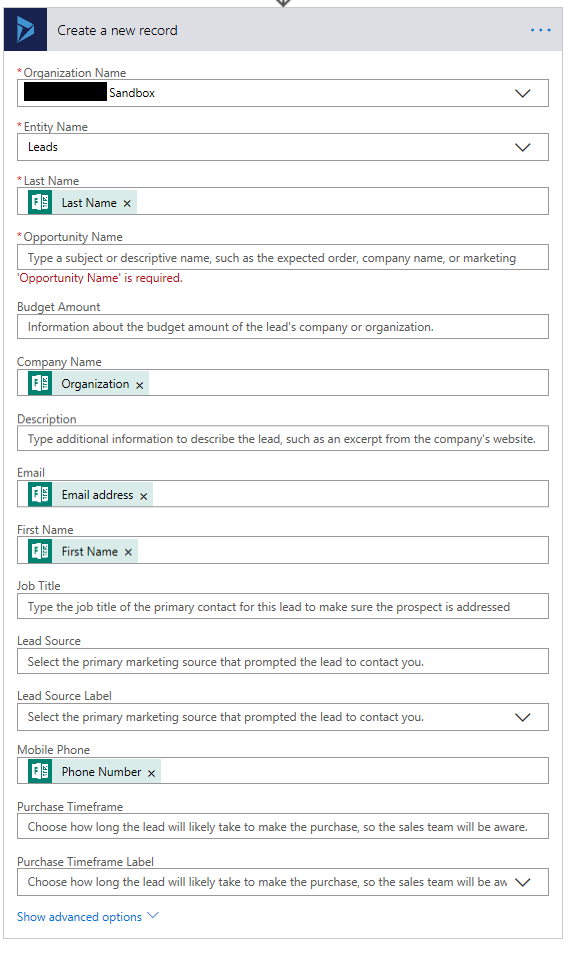
Create-CRM-record
So, for our example, the question remains: What to put in the “Opportunity Name” field. There’s a few ways we can handle this, depending on the input form we created. In my demo form, I didn’t make Organization name a required field.
I want Flow to use the organization name if it is populated, or the respondent’s first and last name if it isn’t populated. I will handle this as follows. First, I need a variable to store the value in. So, back at the top, just below the trigger, I will add an Initialize variable action to create a string variable called “opportunity”. (Remember that Flow requires that all variables be initialized at the very top).
Next, just after the “Get response details” action in the loop, I will add a “Condition” action. In the first box, select the “Organization name” output from the “Get response details” action. Leave the condition as “is equal to”.
In the “Choose a value” box, click in the box and in the popup, select “Expression”. In the expression entry box, type “null” and select Ok.
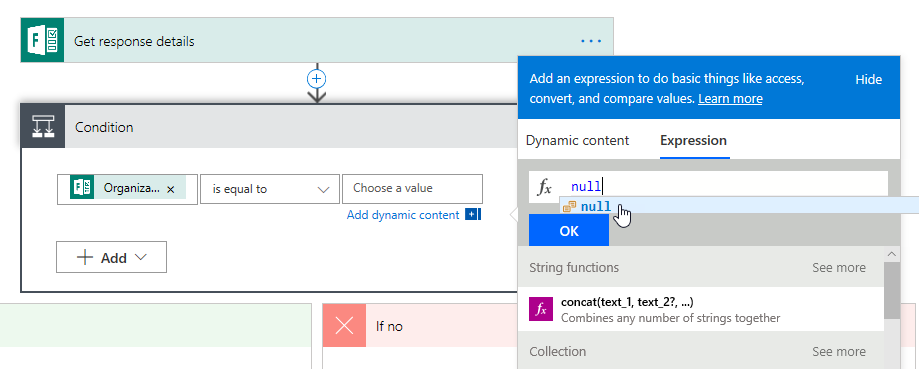
Choose null
Under the “if yes” branch, add a “Set variable” step and set the value of opportunity to the first and last name outputs. In the “if no” branch, do the same, but set the value to the organization name output.
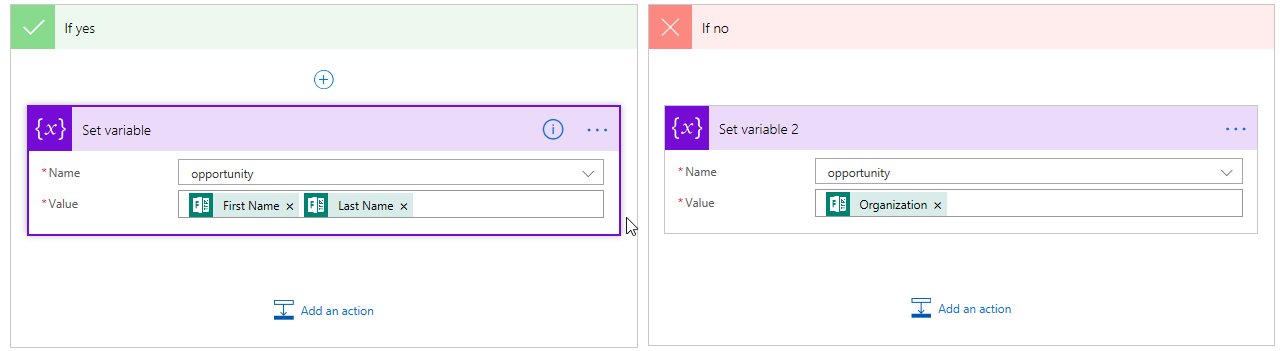
Set opportunity
Now back in the “Create a new record” action, set Opportunity name to the opportunity variable value.
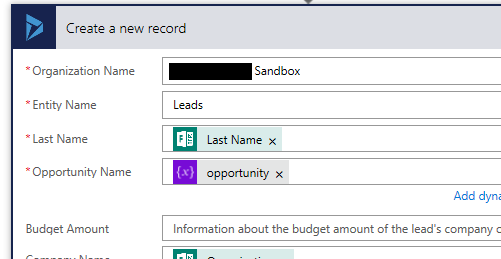
set-opportunity-name-in-create
Notify
The last step is to notify someone that a new record was added. In the “Apply to each” loop, at a step at the bottom. Your notify can be as complex or simple as you like. In this case, I’ll just send a quick email including the relevant info.
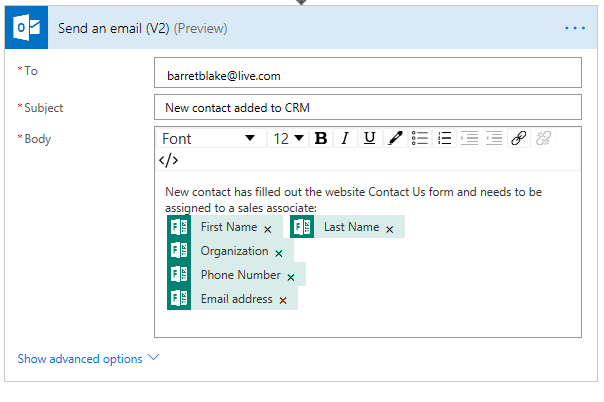
send-an-email
Fin
And that’s it. Very simple, very easy, and easy to apply to any of the connectors Flow has available, which are many. Here’s the final flow:
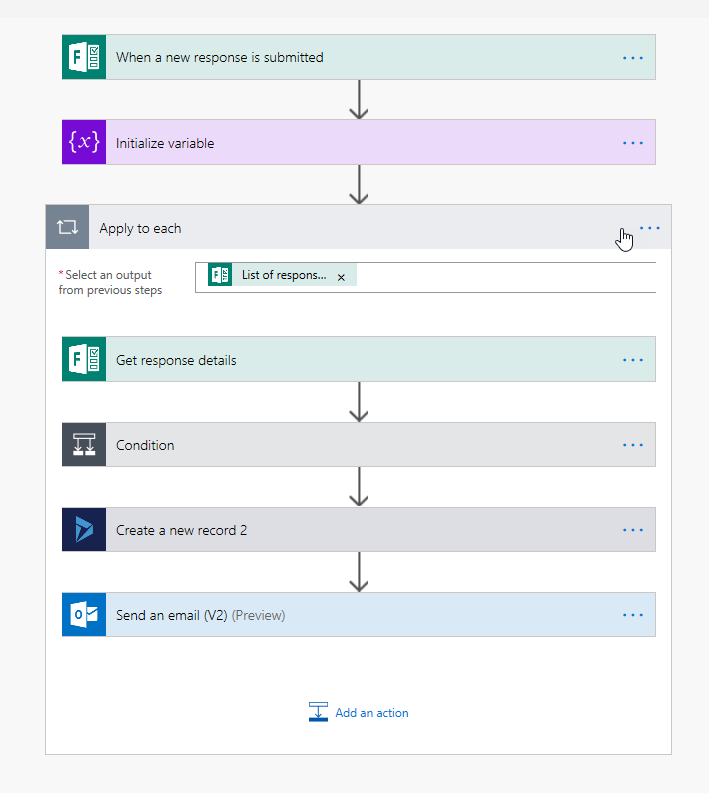
final-flow
