

Barret
Thursday, January 3, 2019 | 7 minutes
Microsoft Flow - Manually Triggering a Flow
My previous articles on Flow have all had external Triggers of some kind: a blog post, a tweet, a timer and so forth. There are times when you want to have a Flow that you can trigger on demand. One solution to that is to use a Flow button.
The Flow mobile app for iOS and Android has a menu tab (currently the middle of the menu options) called “Buttons”. When you create a Flow that is started by a button Trigger, a button will appear in your app allowing you to trigger the Flow.
A lot of people have jobs where they have to keep track of hours and/or expenses. Some of you may have a dedicated mobile app to use, but a lot of companies go the route of making you keep track and enter them into a web portal on a regular basis. That’s a difficult and time consuming thing to accomplish if you’re at a lunch or the hotel on a business trip or something else.
Flow to the Rescue
We’re going to use Flow to simplify the process for us. We’ll assume, for this example, that you have a work Office 365 account that gives you access to Excel Online for Business and OneDrive for Business. You can, however, substitute any number of other resources that Flow has connectors to such as Google Sheets or Dropbox.
Let’s create a new Flow from the “My flows” menu. For our Trigger, we’re going to select “Manually trigger a flow”. One of the things we can do with a button Trigger is to present the user a simple form to enter certain pieces of data when they start the Flow.
For our Flow, we’re going to have the user provide 5 pieces of data: category, amount, client name, comments and an image of the receipt. For each input we want to add, we will click the “Add an input” button at the bottom of the “Manually trigger a flow” box.
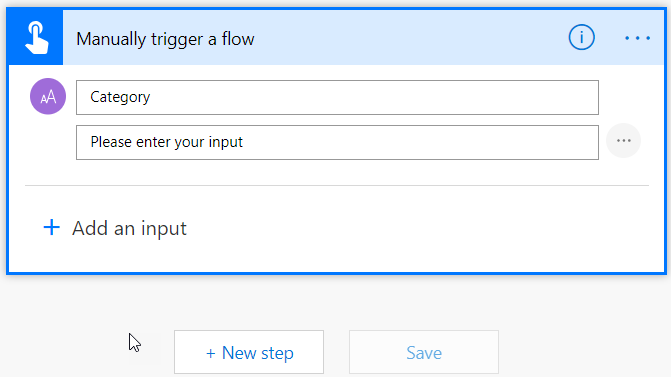
Manually trigger a flow
There are six data types that can be used. Each field can be marked as optional. The default is set to required for all fields. For our Flow, we’ll make the comments and receipt image optional and leave the other three as required fields.
Text - A simple text box. The text can be free-form entered or selected from a drop-down or multi-select list box.
Yes/No - Used for any boolean choice.
File - Attach a file to the Flow.
Email - A textbox with email address filter.
Number - A textbox with a number filter.
Date - A date select box.
For our four data fields, we’re going to use the following:
Category - A text field with a drop-down selection.
Amount - A number field.
Client - A text field. We could have a drop-down list attached if our client list doesn’t change often, but it’s easier to leave it free-form.
Comments - A text field.
Receipt Image - A file attachment.
When we’re done, our Trigger should look something like the following:

Completed-Trigger
Prepping Our Spreadsheet
Next, we need to go out to our OneDrive and create a blank Excel spreadsheet that will receive our Flow records. Where you would like to place it in your OneDrive file structure, create a blank Excel workbook. Rename the default “Sheet1” to something useful like “Raw Data”.
Now we need to create an Excel table. Highlight the first 6 columns in the first two rows, then select “Format as Table” from the Home menu in Excel. Pick your color scheme. Check the box that says “My table has headers” then click OK.
If you did not add a header row already, rename the column headers at the top of the 5 rows to represent your data fields. Something like “Category”, “Amount”, “Client”, “Notes” and “Receipt image link” will do. We’ll also need one more column for a timestamp. So the 6th column give a name like “Date”. Order them however you like.
Now click anywhere inside the table and click on the “Design” button from the top menu. In the very left box of the ribbon, you should see a “Table Name:” field. In that box, put a name for the table. Something like “ExpenseRecords” (no spaces allowed).
Finally, save and close your Excel file.
Decisions, Decisions
The next Action we need to add is a condition. We’ll need to have a different action if there’s a receipt image than if there isn’t.
Go back to the Flow and add a Condition Action after the Trigger. After it’s added, click the text in it that says “Edit in advanced mode”. In the text box after that appears, enter:
@empty(triggerBody()?['file']?['contentBytes'])
This is checking to see if there is a file attached. If there is a file attached, it will follow the “If no” path. If there isn’t, it will follow the “If yes” path. It’s a little backwards, but that’s because it’s checking to see if it’s empty, not if it has data.
If yes
Let’s start with the “If yes” path. This is the path where we DO NOT have a receipt image file attached. Click on the “Add an action” button inside the “If yes” path and search for “Excel”. In the upper box, select “Excel Online (Business)” and in the Actions list select “Add a row into a table”.
This will have several parameters to be set. Starting from the top:
Location - In this drop-down, select “OneDrive for Business”
Document Library - Select “OneDrive”
File - Select the path to the Excel file you just created.
Table - Select the name of the table that you created previously in the Excel spreadsheet. This would be “ExpenseRecords” for our example.
Once you select this, you will see 6 more boxes appear. These will have the same names as the column headers in your Excel spreadsheet table. For this branch, we will enter values for all except the Receipt image link column. Leave that box blank. Once you’re done, your “Add a row…” Action should look something like this:
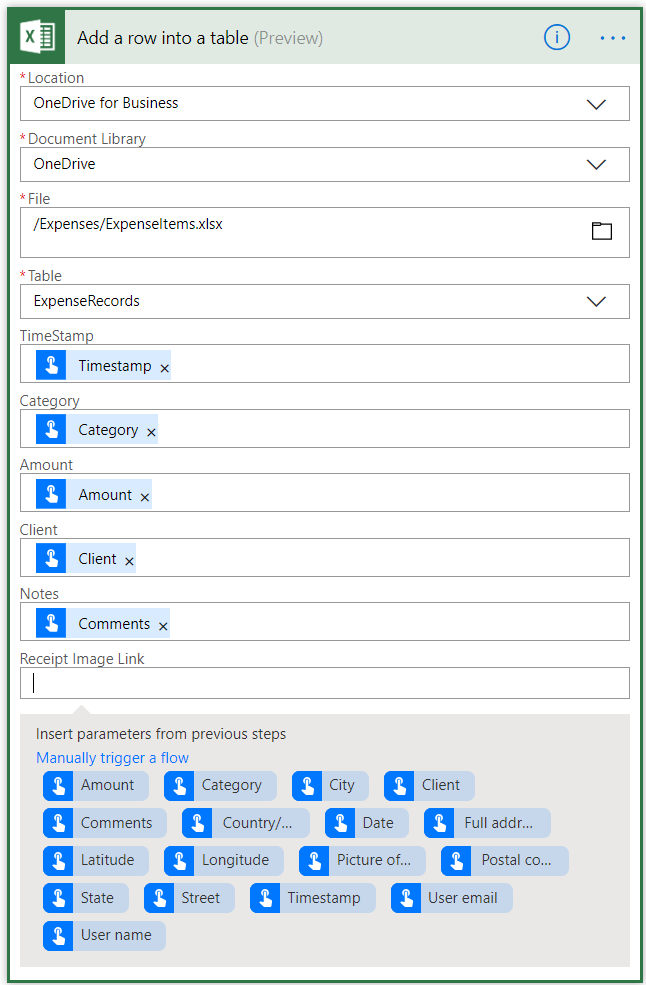
If yes add row
As you can see from the picture, the button Trigger provides a number of location based pieces of information as well obtained from your phone’s GPS by the Flow app. But we’re not going to include any of those here.
That’s all we need for this branch. Now let’s look at the other branch.
If no
For our other branch we’ll need some extra steps to save off the image file to OneDrive and get a link to the file to add to that column in the Excel spreadsheet.
Go out to the OneDrive folder you created to store your expense report Excel file. Create a sub-directory in that folder and name it something like “Receipt images”.
Now, back in our Flow, go to the “If no” branch of our Condition. Click on the “Add an action” button.
Search for “OneDrive” and select the “Create file” Action under the “OneDrive for Business” connector.
In the “Folder Path” parameter, select the sub-folder you created for your receipt images. For the “File Content” parameter, select the receipt image output that you added to the button Trigger at the top. In my example, it’s “Picture of Receipt”. For the “File Name” parameter, the file name isn’t part of the standard outputs for the button Trigger, so you’ll need to use the following code to get the filename:
string(triggerBody()?['file']?['name'])
Now that we’ve saved our file to OneDrive, we need to get a link to the file to be added to our Excel spreadsheet.
Add an Action after the “Create file” Action. Again search for “OneDrive” and under “OneDrive for Business” select “Create share link”.
For the “File” parameter, select the “Id” output from the “Create file” Action. For “Link type”, select “View”. And for “Link scope”, select “Organization”. This will create a link to the file that anyone in your org can use to view the file.
Lastly, after the “Create share link” Action, we will add another Excel Online “Add row into a table” Action. This will be identical to the version in the “If yes”, except in the “Receipt Image Link” box we will select the “Web URL” output from the “Create share link” Action.
Fin
Now save your Flow and give it a test run! You should see the new button on your Flow app on your mobile device.
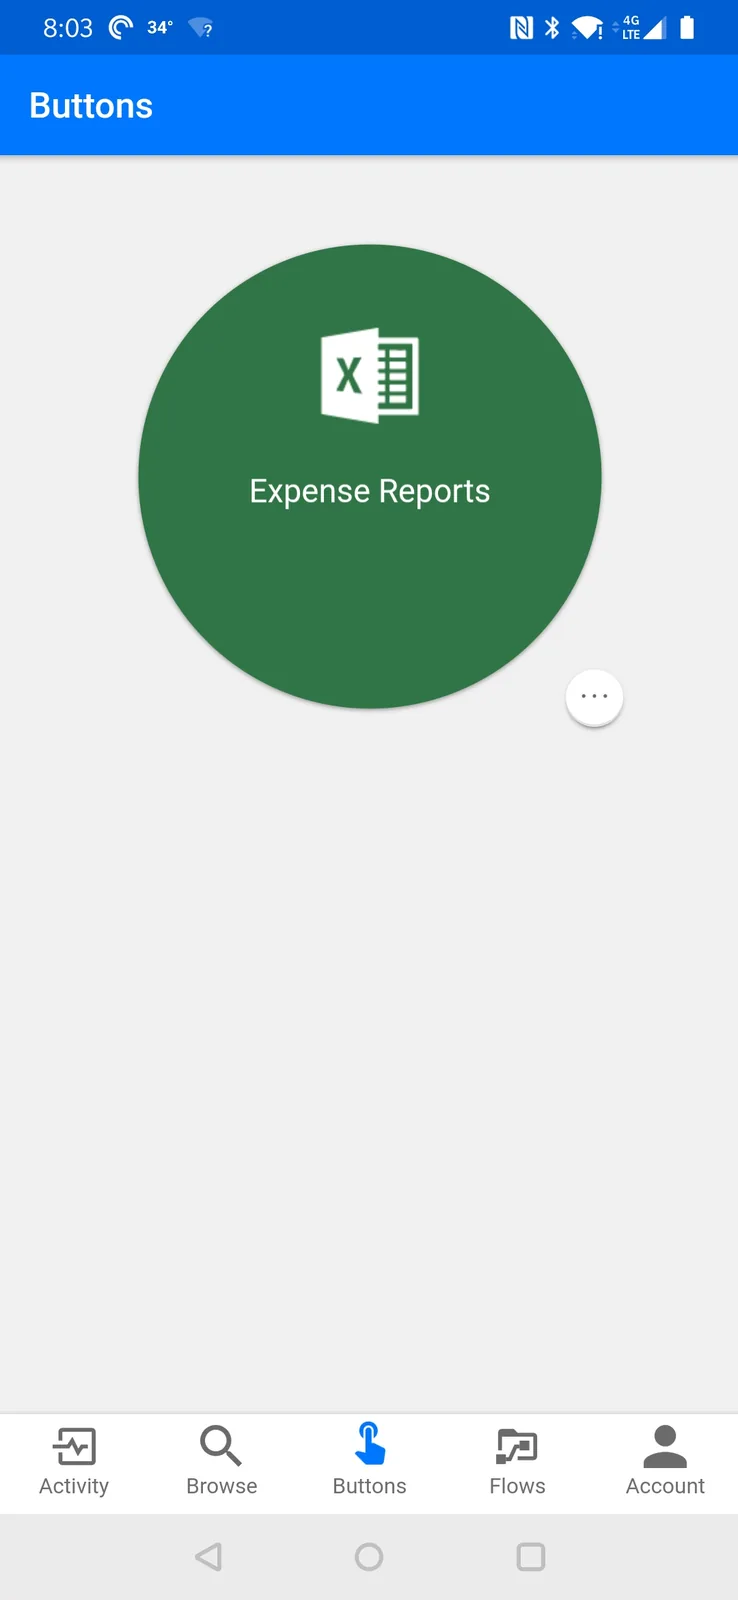
Click it and you’ll see your input form.
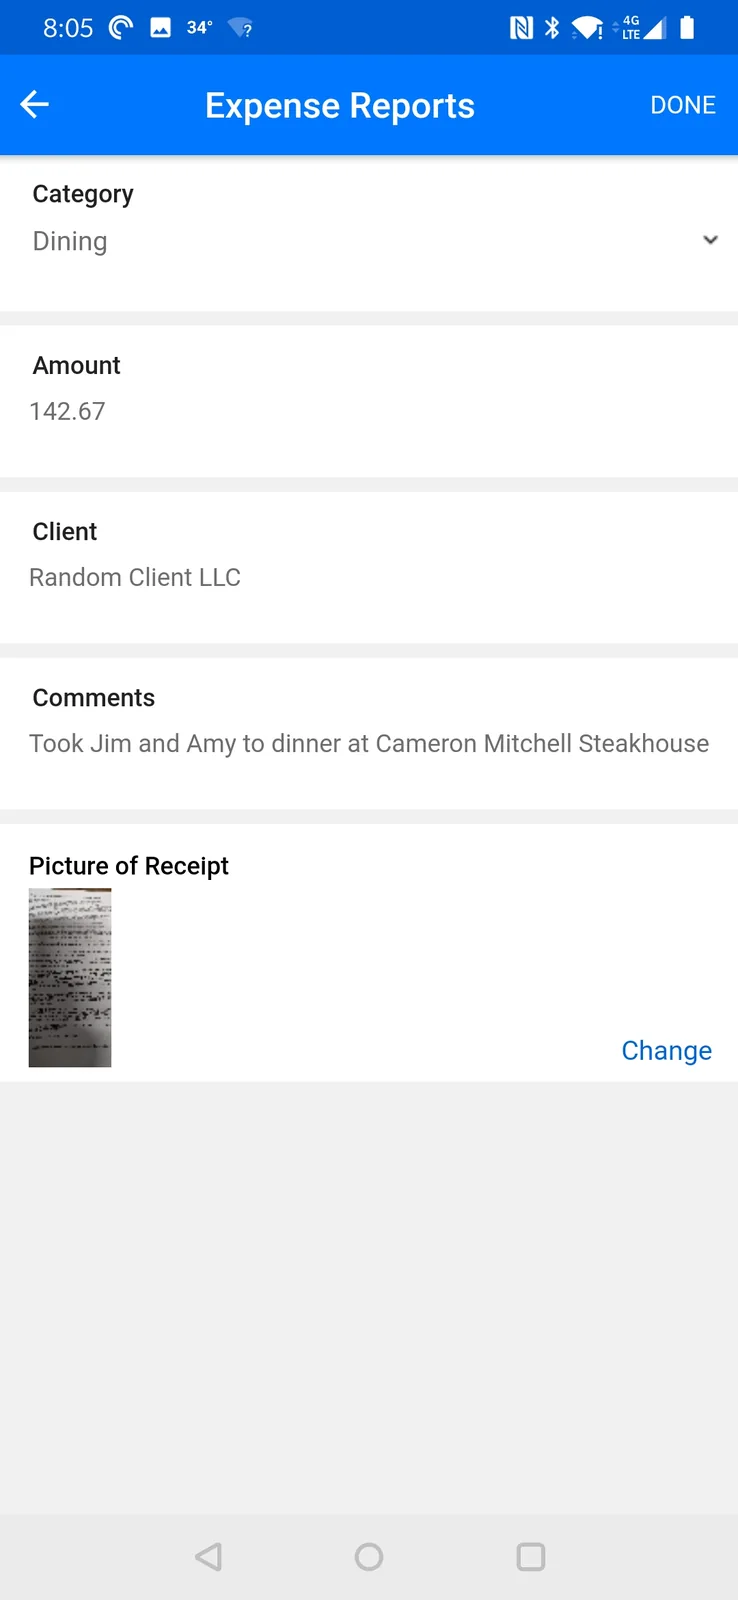
Report-In-Action
Fill out the fields, attach the file and click DONE. Do this 2 or 3 times, then go to the Excel spreadsheet and take a look. You should find the new rows of data matching your inputs.

Excel
There you go! A simple expense tracking Flow to help you keep track and keep the accounting department happy!
Full Flow

Full-Flow-manually-trigger
