

Barret
Monday, August 5, 2019 | 4 minutes
Tagging Images with Flow and Azure Vision API - Part I
Photo by Brett Jordan on Unsplash
This time, in our continuing adventures with Microsoft Flow and the Azure Cognitive Services Computer Vision API, we’re using the Vision API to tag image files. The flow will pass the Vision API image files from OneDrive and update the image files with the list of auto-generated meta tags the service returns to us.
Part I will walk through the creation of the flow, getting the tags and adding them to the file. Part II will build on that flow to add checks for duplicate tags and applying domain knowledge to identify things like celebrities and landmarks in our flow.
The Trigger
First, we’ll need a couple of folders set up in OneDrive. The first folder will be where we drop files to be tagged. The second folder will be where the flow will move the completed files to.
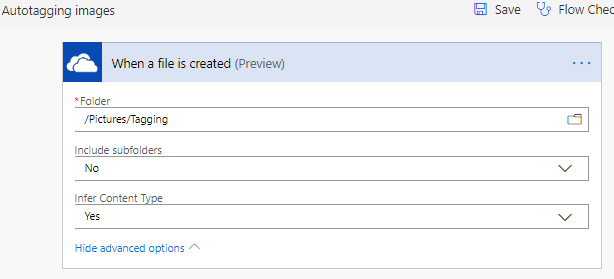
We’re going to use the same starting trigger as we did in our thumbnails flow. Create a new Automated flow and search the triggers for OneDrive -> “When a file is created”. Set the folder property to a folder you have created in OneDrive for the purpose of tagging images.
As in the previous flow, we’ll want to select No for including subfolders and Yes for Infer Content Type.
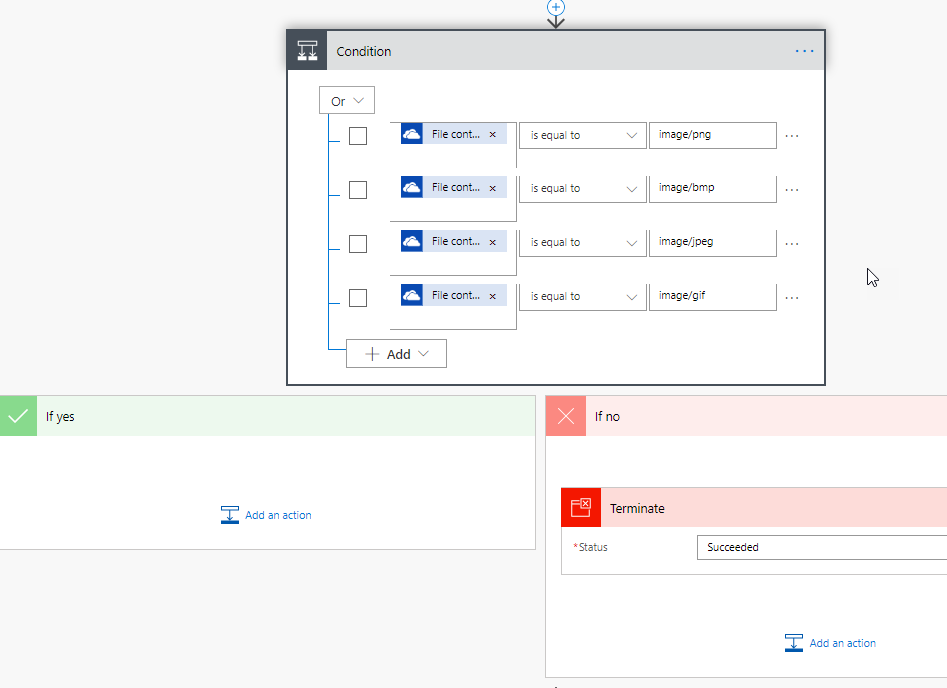
Our condition checking to see if this is likely an image file based on inferred content type of the file
Next, let’s add our condition to check for the proper file content type. Add a Condition action and the four “Or” checks to see if we’re dealing with a standard image file. The “If yes” does nothing, the “If no” side runs a Terminate action with the Succeeded status.
Our condition checking to see if this is likely an image file based on inferred content type of the file
Calling the Vision API
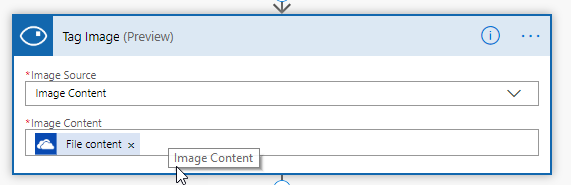
Now that we’ve done our image file sanity check, it’s time to call the Vision API and get our tags. Search the actions for Computer Vision API and select the “Tag Image” action. (Note: The Computer Vision API actions are currently in preview in Flow and subject to change).
For the Image Source, select the “Image Content” type and for the Image Content, select the “File content” output from the OneDrive trigger. This will pass in the file content as a base64 text stream.
call-the-api
Applying the Tags
The tags will come back as an array, so our next action will need to be an “Apply to each” loop. Add that at the bottom of the flow. Select the tags output from the Tag Image action as our parameter to loop on.
Now here’s where it gets a little tricky. Each tag that the Vision API returns to you has a level of confidence attached to it. This is a score ranging from 0 to 1, with a score close to 0 being very little confidence and a score close to 1 being high confidence. We’ll need to decide what our threshold score is for applying the tag. That’s entirely up to you, but in this case I’m going to select a threshold of 0.8. I only want tags with a high degree of certainty.
Inside the loop box, we’ll add a Condition action. In the left box, select “Tag Confidence Score” from the list of outputs, “is greater than” for our condition, and 0.80 for the right box value.
Now it’s time to apply the high scoring tags to our image. In our “If yes” box, we’ll add a OneDrive -> “Add file tag” action. For the file, select the “File identifier” output from the original OneDrive trigger and for the Tag field, select the “Tag Name” output from the Tag Image action.

looping-tags
Wrapping Up
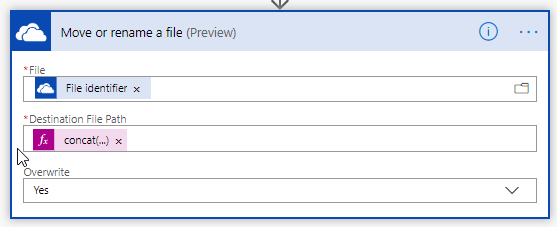
The last step we’re going to add this time is to move the file to the second folder we created in OneDrive. This will let us know that the flow has completed running. At the very bottom, select “New step” and look for the OneDrive -> “Move or rename a file” action.
For the File, again select the File Identifier output from our trigger. For the Destination File Path, we’re going to have to build the name ourselves. Enter the following expression for its value:
concat('/Pictures/Tagging/Tagged/', triggerOutputs()['headers']['x-ms-file-name'])
Replace the first half of the concat with what the path to your image folder is in your own OneDrive.
For the last option, Overwrite, go ahead and select Yes.
move-the-file
Fin
That’s all for the first part of. Next time we’re going to cover avoiding duplicate tags and adding a little domain knowledge. Here’s our flow so far:
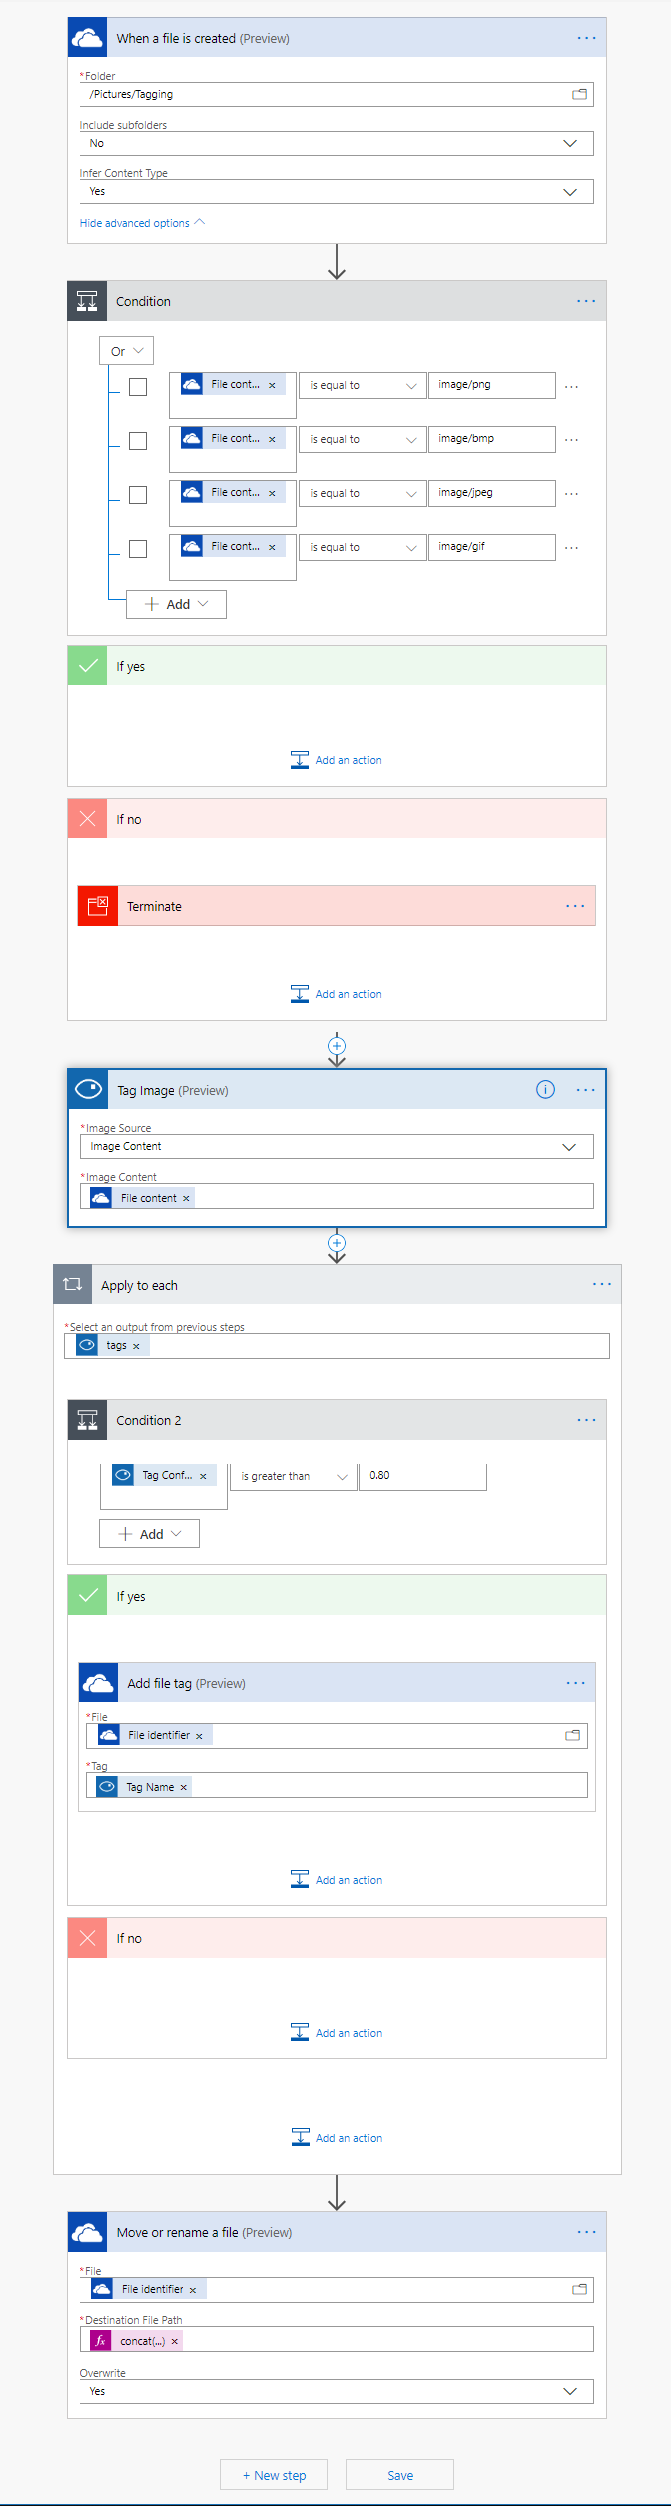
Tagging images final flow
