

Barret
Saturday, December 19, 2020 | 6 minutes
C# Advent 2020 - ASP.NET Core API Endpoints
MVC is a mess. Controllers in one folder, views in another, services in another, models and viewmodels in yet other folders. Related files are all over the place. Trying to piece together these related pieces can be a real pain. Steve “ardalis” Smith has come up with another way: ASP.NET Core API Endpoints.
The concept is a simple one. Everything that’s related can easily be put in one folder, maybe even in one file. Steve explains much better: “Instead of Model-View-Controller (MVC) the pattern becomes Request-EndPoint-Response (REPR). The REPR (reaper) pattern is much simpler and groups everything that has to do with a particular API endpiont together.” By putting everything together, maintenance and development are all much easier. As Steve notes, this is a concept that the .NET team has done in creating Razor pages.
By using the REPR design pattern, the view and code pages are kept together and easily maintained. And your API project can be structured in a much more logical manner, based on functional area. We’re gonna walk through setting up and creating a demo API project using Steve’s API Endpoints project.
Project Setup
We’ll start with a straightforward .NET Core solution. Create your solution as normal, adding two .NET Core ASP.NET web projects. One of these will be our API, and the other will be our UI. I also tend to create a third project to serve as a common library that both of the other projects can reference. It should be noted, however, that none of that is strictly necessary. You can put it all into a single project and call it a day.
For our demo project, we’re going to simulate a simple student information system. As our core we’re going to have a student class. The class will contain a few straightforward properties, such as names, student ID, grade level, current GPA, and a database ID.
public  class Student
    {
        public Guid Id { get; set; }
        public DateTime CreatedOn { get; set; }
        public Guid CreatedBy { get; set; }
        public string FirstName { get; set; }
        public string LastName { get; set; }
        public string MiddleName { get; set; }
        public string Title { get; set; }
        public string SchoolStudentId { get; set; }
        public byte GradeLevel { get; set; }
        public float GPA { get; set; }
    }
Our goal for this demo will be to create pages to:
- List all current students
- List the details of a single student
- Create a new student
User Interface
The UI piece is easy. There are no changes whatsoever to how you do your UI and how you call the API from your user interface. Whatever you’re doing now, just keep doing it. In this case, we’re using Razor pages, so we can grab our data like this:
    public class StudentsModel : PageModel
    {
        public List<Student> students { get; set; }

        public async Task OnGet()
        {
            var url = "https://localhost:44392/api/people/students";
            using (var httpClient = new HttpClient())
            {
                using (var response = await httpClient.GetAsync(url))
                {
                    string apiResponse = await response.Content.ReadAsStringAsync();
                    students = JsonConvert.DeserializeObject<List<Student>>(apiResponse);
                }
            }
        }
    }
and it will get stuffed into our page like so:
    <h1>Students</h1>

    @foreach(var student in Model.students.OrderBy(x=>x.LastName).ThenBy(x=>x.FirstName).ThenBy(x=>x.SchoolStudentId))
    {
        <span>@student.LastName, @student.FirstName -- @student.SchoolStudentId</span><br/>
    }
API Structure
Let’s start with adding the API Endpoints NPM package to our API project. There is just one package we need to add. It takes care of everything for us.
Install-Package Ardalis.ApiEndpoints -Version 2.0.0
We’ve installed our dependency, defined our basic goals, and covered our UI. Lets talk about the API structure now. By using API Endpoints, we can pretty much define our project structure in whatever way we want to. Following the REPR design pattern, we want to break down our structure into units of logically related functionality. This can be whatever makes sense for the application at hand. In this case, we’re going to create a top level folder called People, then a Students folder beneath that. Like so: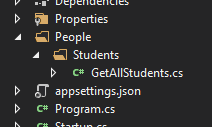
The image also demonstrates our next concept. Each endpoint gets its own file. And the files should be named in a manner to define what it does. Instead of having a single controller class that holds all of our student endpoints, such as our gets and posts, each file has a single task. In this case, the example shows our first file: GetAllStudents.cs.
Another way you might look at it is to create your API folder structure to roughly match what your user interface might look like. In other words, the folder structure could be build to match the menu structure, with sub folders matching sub-menu items in your UI/UX. An expanded look at our potential student information system might look something like the following:
- People
- Students - all the models, endpoints and services related to students in here
- Teachers - all the models, endpoints and services related to teachers in here
- Parents - etc…
- Courses
- Extra-Curricular
- Clubs
- Sports
- Music
- Buildings
- Rooms
- Scheduling
- Calendars
- Administration
Or maybe you want to put things into a structure more like:
- People
- Students
- Endpoints
- Models
- Services
- Students
Again, it can end up being anything you want. Whatever structure makes the most sense to you and your project, you can do it. The key point is that all the related code stays together (or very close) instead of having multiple folders (controllers, views, models, etc) with the same substructure beneath each.
API Endpoint Code
Let’s look more closely at the code itself. Classes that use the API Endpoints functionality all follow the same general pattern, so let’s take a look at how a typical class will be structured.
    using Ardalis.ApiEndpoints;
    using CSAdvent2020.Core.People;
    using Microsoft.AspNetCore.Mvc;
    using System;

    namespace CSAdvent2020.Api.People.Students
    {
        [Route("api/people/student/{id}")]
        public class GetStudent : BaseEndpoint<Guid, Student>
        {

            [HttpGet]
            public override ActionResult<Student> Handle(Guid request)
            {
                throw new NotImplementedException();
            }

        }
    }
Let’s start at the top. We use the Route attribute to define the route as we would with any endpoint. The route gets attached to the class and not any of the functions in the class itself. That’s pretty standard.
Next, the class implements interface BaseEndpoint. There are two variants, depending on whether or not you are passing in request parameters.
- BaseEndpoint
- BaseEndpoint<TRequest, TResponse>
TResponse will be whatever you’re returning. In the example above, we’re getting a single student, so TResponse is Student. TRequest is what you’re passing in, either a single type or a class if you’re posting form data.
The interface defines just a single function: Handle. Handle is the function that will respond to your request and return your response. Decorate the Handle function with your request type attribute: HttpGet, HttpPost, etc.
Let’s look at another example:
    [Route("api/people/students")]
    public class GetAllStudents : BaseEndpoint<IEnumerable<Student>>
    {
        Random rand = new Random();
        IStudentService studentService;

        public GetAllStudents(IStudentService _studentService)
        {
            studentService = _studentService;
        }

        [HttpGet]
        public override ActionResult<IEnumerable<Student>> Handle()
        {
            return Ok(studentService.GetAllStudents());
        }
    }
This example makes use of the other pattern, where we aren’t passing in a parameter. So, BaseEndpoint only has TResponse with it, and our Handle function doesn’t have any parameters.
Conclusion
Using API Endpoints makes organizing your API project into a structure that focuses on features much easier. It helps you to organize yourself and keep all of your related code in a much easier to work with structure, and one that in the end, just makes more sense.
Note: Apologies for the shortness of this post. Real life intruded the last couple weeks.
