
Barret
Sunday, November 7, 2021 | 9 minutes
AI Builder: Training a Invoice Processing Model
One of the more complex features of Power Automate is the ability to train it to pull data out of scanned images of invoices and automatically import the information. I included a walkthrough of how to get started with this feature in my recent conference talk at Summit NA 2021, but I felt it would be beneficial to provide it in blog form as well.
- It should be noted that AI Builder is a paid add-on to Power Automate and does incur an extra cost to use. However, a free trial is available. See the Microsoft Power Automate site for more info.
Getting Started
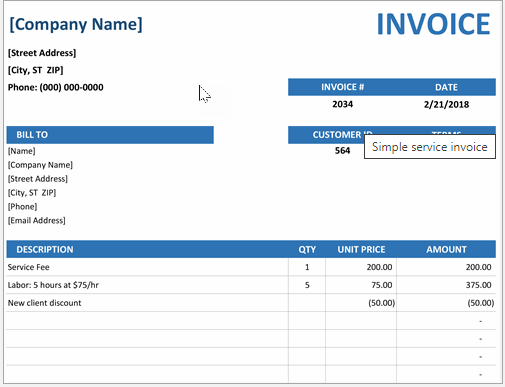
The first thing you are going to need to get started is to gather at least 6 images of each format of invoice you intend to automate. You will need at least 5 images of each type to use to train the AI model to recognize where to find the data being sought from the invoice. The rest of the sample images will be used to test the model once it’s trained. If you’re looking for example invoices to use for learning purposes, the Microsoft AI Builder documentation includes 2 versions of invoices you can use for this purpose. Or you can use real invoices that you have around.
Creating the Model
Once you have your training and testing document images, the next step is creating the model. In the Power Automate menu, near the bottom you will see a selection for “AI Builder”. Click to expand that and select “Models” open up the models list. If you don’t see AI Builder in your menu, then you do not have an active paid or trial AI Builder license for Power Automate and will need to add it to continue.
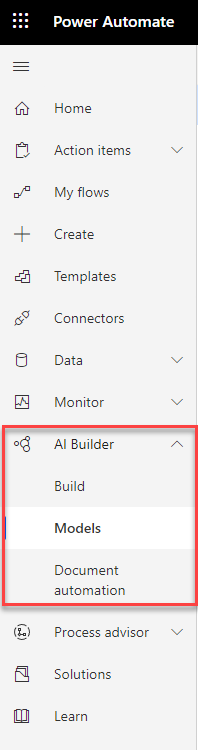
AI-Builder-Menu
Under the Models tab, select “Build a model” at the top left to create a new model. For your invoice model you’re going to select “Form Processing” as the model type.
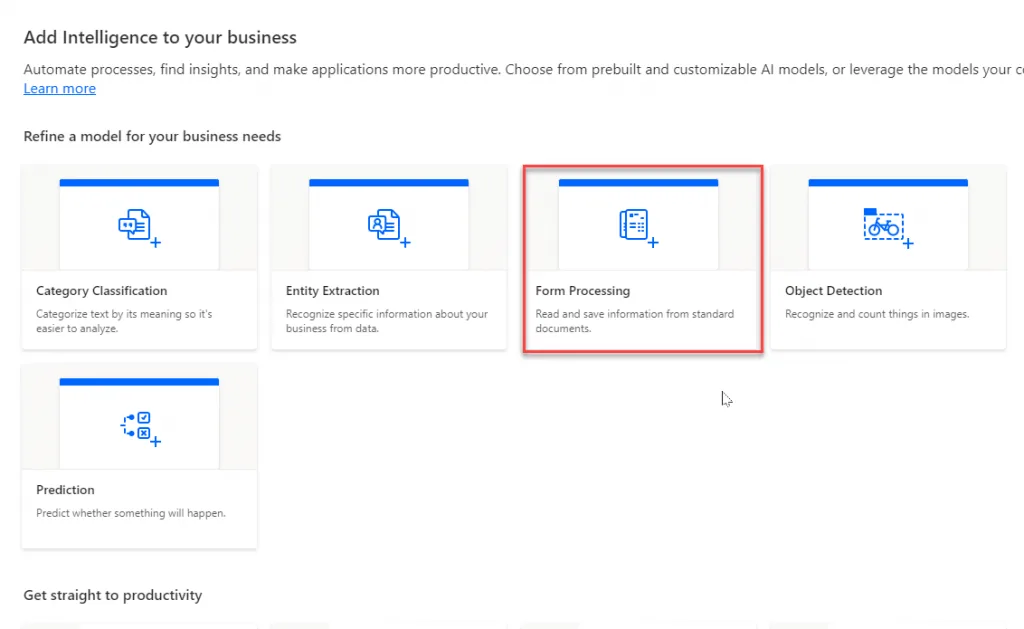
AI-Builder-Form-Processing
Give your model a name and click “Create” to continue. A new screen will appear asking you to choose the information that is going to be extracted. This is where you will define what fields you intend to extract from the invoices you will be processing. One of the things you’ll notice about this screen is that it is divided into 3 main sections. To left you’ll find a progress diagram that will show you the progress you’re making through setting up your model. In the center is your working screen. At the moment you’ll see an “Add” button where you can enter the list of data items you’re going to be extracting. And to the right is a “Quick tips” section. With AI Builder this section will show you a great deal of useful information on your progress, the kinds of things you can do and other helpful items.
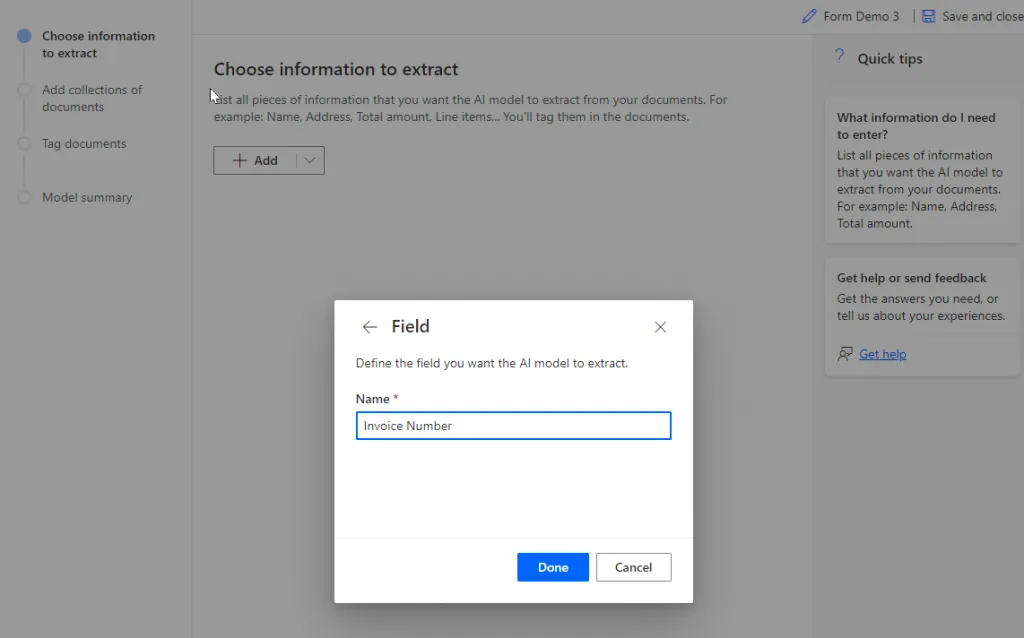
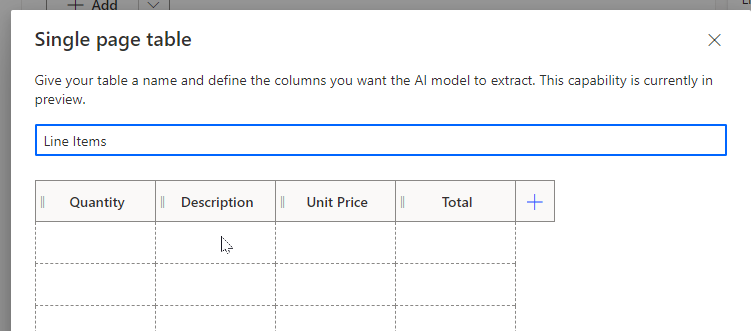
Go ahead and click “Add” to start adding the list of fields you want to import. There are three types of fields. The first is “Field”. This will be single data fields, be it an address line, a name, a phone number, and invoice number, a total dollar amount, or so on. The second type is “Single page table”. This field encloses a grid of information, typically the line items on the invoice. The last field type is “Checkbox”. This one is in preview right now and I won’t be including anything more about it here.
For each item you want to import, click “Add”, select the type, give it a name and click “Done”. For our demo, we’ll keep it simple. We’ll enter Invoice Number (Field), Date (Field), Line Items (Single page table) and Total Amount (Field). It’s important to remember that all data extracted from the form will be extracted as text. Nothing in the AI Builder model will automatically identify it as a date, number, currency and so forth. It will be up to you to take that data and create processes to convert the text strings into the data types that you need in your CRM, ERP or whatever system you’re importing the data into.
AI-Builder-Adding-Fields
One note to point out here. When you add a table field, you will be asked to identify the columns that the table contains. The order doesn’t matter. When you train the model, you’ll identify the order of columns there.
AI-Builder-Table-Columns
Once you’ve identify the fields to be extracted, click “Next” to move on to the next step.
Training the Model
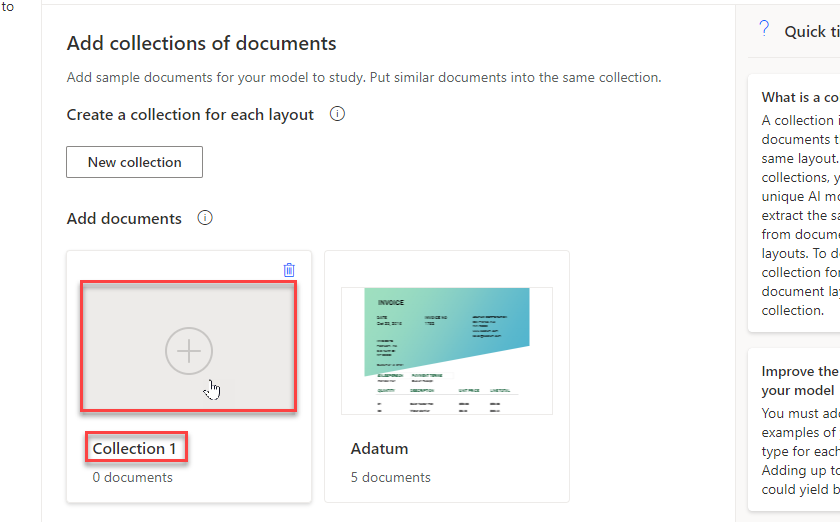
The next step is to train the model you’re creating using the sample images you’ve collected for training purposes. Training documents are broken up into collections. Each collection is a group of the same invoice format. In my demo presentation I mistakenly stated that you needed a different model for each invoice/form type. This used to be the case, but is no longer the case. Now you can use a single model with multiple collections of documents. For each collection, you will follow the same process.
Click on the collection name (i.e. “Collection 1”) and give the collection a name which identifies it. Next, click on the + symbol above the name. This will open a form where you can upload your training documents.
AI-Builder-Add-Collection
In the popup, click “Add documents” and then select the documents to be added. Currently you can add from your local device, SharePoint or Azure Blob Storage. Once you have uploaded at least 5 documents for each collection, click “Next” to move on to the next step.
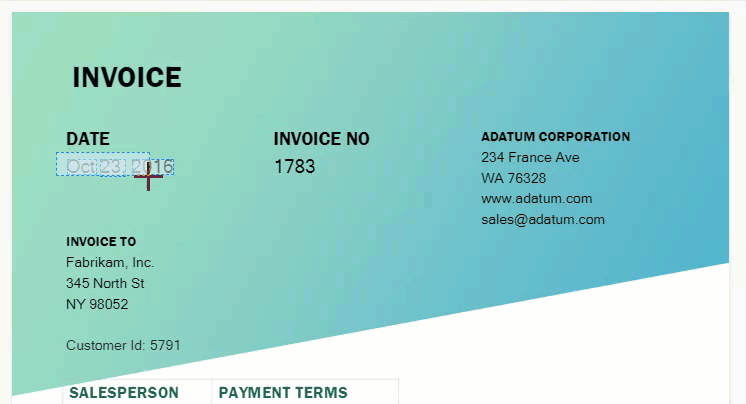
After uploading documents, the next step is to tag them. During tagging, you will be presented each file one at a time. On each document, you will identify the locations of the data you are looking for. Tagging for fields works the same way for each one. Using your mouse you will click-drag from one corner of the field to the opposite corner. When you release the mouse button, a pop-up will appear and you will select the data field that you have just identified.
AI-Builder-Identify-Field
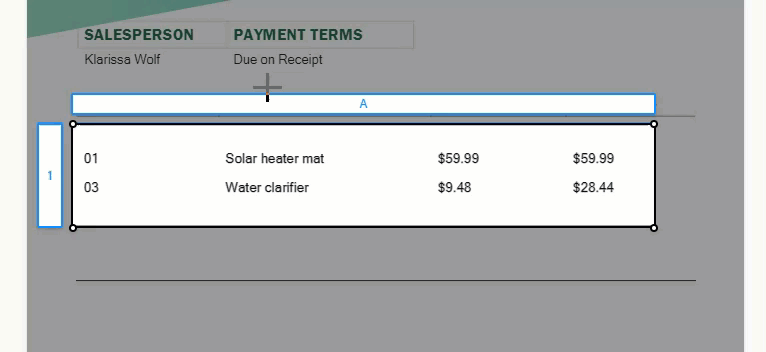
Identifying tables is a little more complicated. You start by click-dragging across the entire table (for ease do not include column headers) as you would with a single field. Then, when you select the table field from the list, you will be presented with a highlighted box to work with. To the left you’ll see a “1”, representing rows. Above, you’ll see an “A”, representing columns. Just like working in Excel. It always starts as a 1x1 grid. Now you need to identify rows and columns. Move your cursor between each row and click once. As you click, you will see the grid splitting the rows into two separate rows above and below where you clicked. You’ll do the same thing for columns, except you will hold CTRL/CMD to change the selector to column mode. Once selected, click in between each column and you’ll see it split the data into columns.
The last step is identifying which column is which. Once you have divided the columns, click on each header (“A”, “B”, “C”, etc) and you will be presented a pop-up asking you to identify the column that it represents. When you do so, the “A”, “B”, “C”, etc. will be replaced with the name of the column. Once you have identified all the parts of the table grid, click “Done”.
AI-Builder-Identify-Table
Once you have identified all of the fields on the page, click the right > in the right column of the page, or click the next document image that isn’t shown with a blue box and checkmark in the top right to move to the next document. You will have to repeat this process for every training document you have provided. This is the tedious part of the exercise. However, the more documents you teach the model to recognize, the better your model will be and the fewer errors you will have to deal with.
Note that you don’t have to do it all at once. You can add and tag a few training images at a time. Power Automate will keep track of your progress and let you know how much you still need to complete. So a few documents a day or all at once, you can work on it at your own pace. Also remember that the order in which you tag documents and the order in which you tag the fields on each document doesn’t matter. For each page, it will track what you’ve selected and not selected and you can approach it however you like. If you need to stop at any point, select “Save and close” at the top right to save your progress and return to it later.
Once you have met the minimum training document requirements, you will see that the “Next” button at the bottom. Once you do so, you will be presented with a summary of what you’ve added so far. You can review the information provided and when you’re satisfied, click on “Train” at the bottom of the page to have the AI Builder system review your documents and learn from what you have taught it.
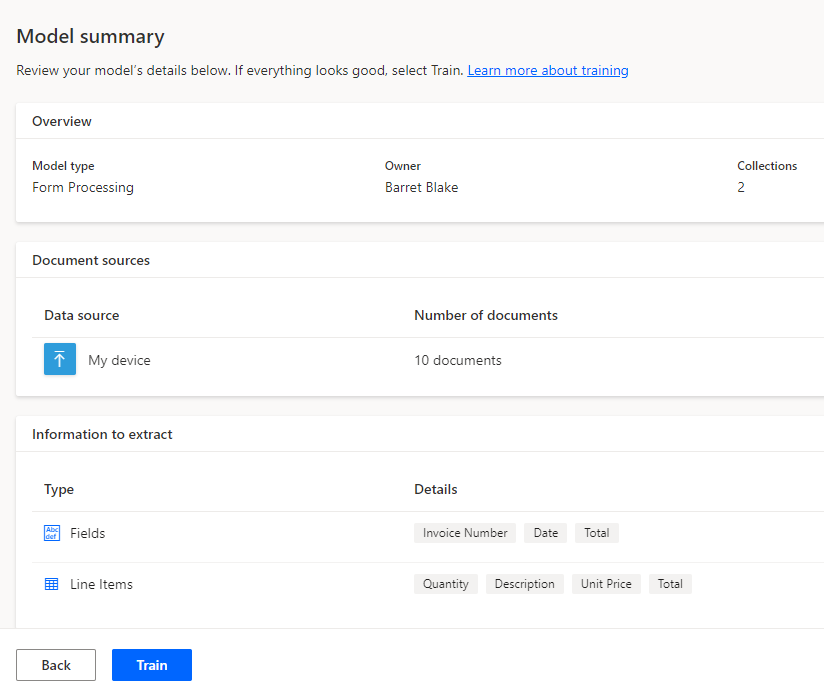
AI-Builder-Release-The-Training
The training may be quick, or it may take quite a while. It all depends on how many documents and how many fields it needs to work through. You can either come back later or wait. It’s all good. If you waited, the page will automatically redirect to the training summary. If you left, you can come back to it by selecting your model from the list on the Models page in the main menu.
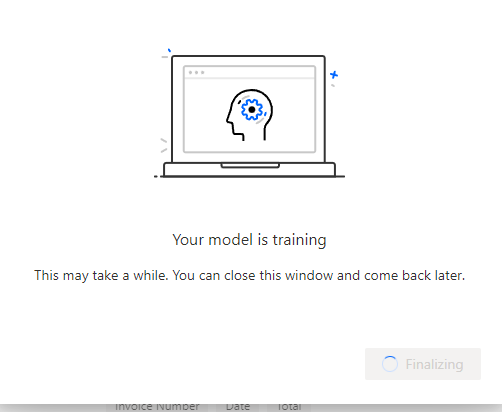
AI-Builder-Training
Publish
After training is complete, the model summary page will show a screen that lets you review the model’s state. At the bottom left you will see two buttons: “Publish” and “Quick Test”. Before a model can be used in Power Automate or Power Apps, it must be published. Once a model is published, it’s then available for your use. The advantage of publishing is that it lets you make changes to the model in the back end while the published version is used in your apps and flows. Once you’re done making changes, you publish the new version to take over.
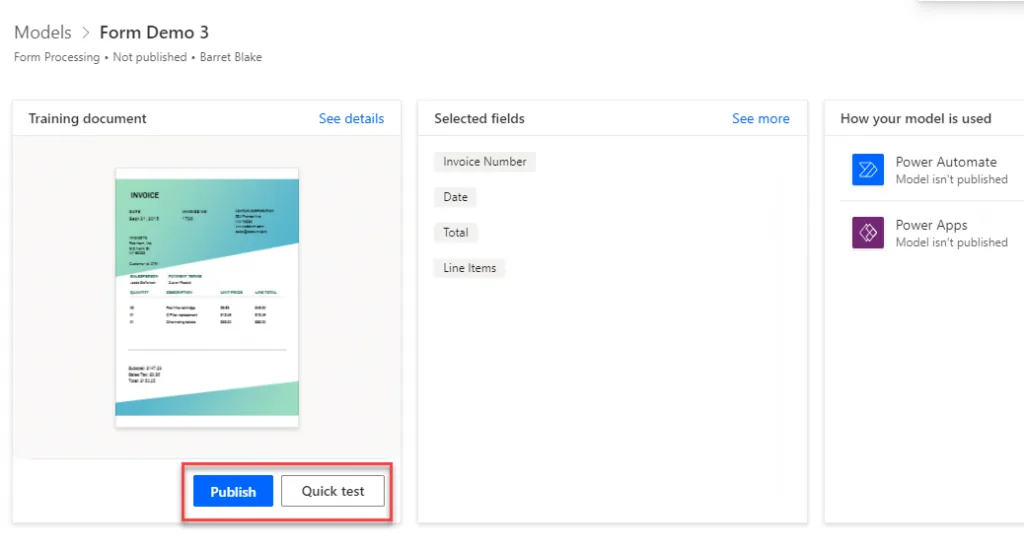
AI-Builder-Publish-Test
For now, we’re going to click on “Quick Test” to test our model. You’ll see a dialog where you can either drag/drop an image file or click “Upload” to select one in the File menu. For the test, select one of the files you have selected for testing purposes and drag it on the form. You’ll see the file displayed in the form and after a few moments, the results will be displayed. As you mouse over each field, you will see the field name, the value and the confidence score for each field it identified.
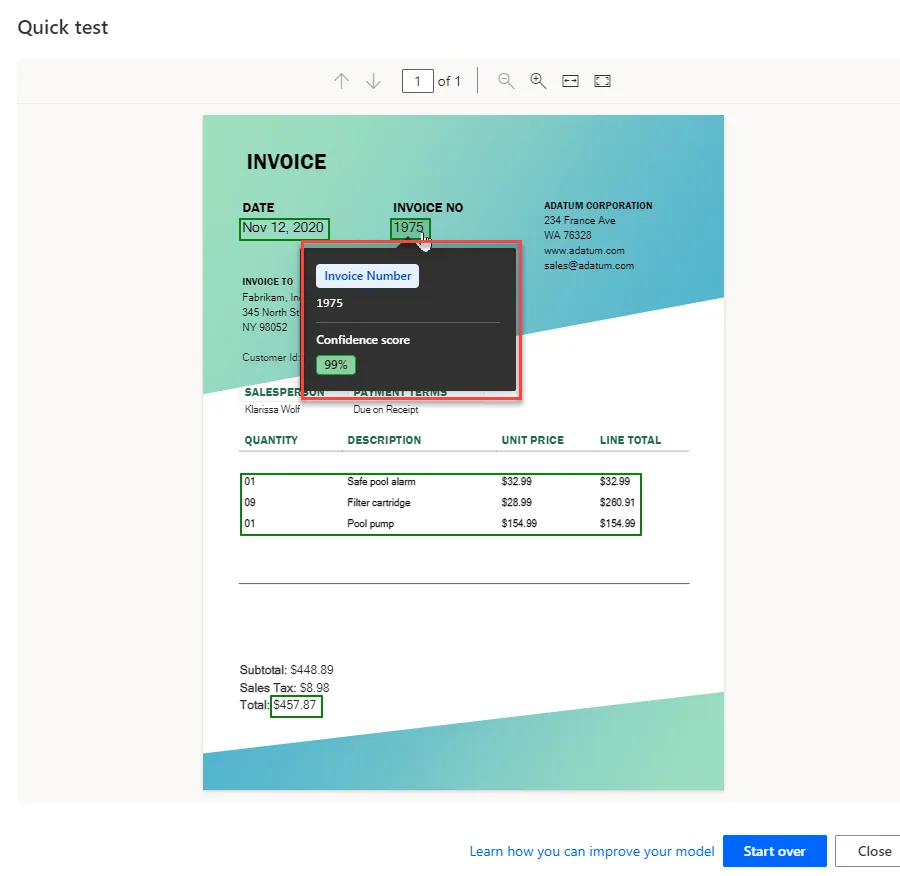
AI-Builder-Quick-Test
For tables, you won’t see values or a confidence score. Instead, if you click on the box, you’ll see another popup with the data it pulled off of the grid.
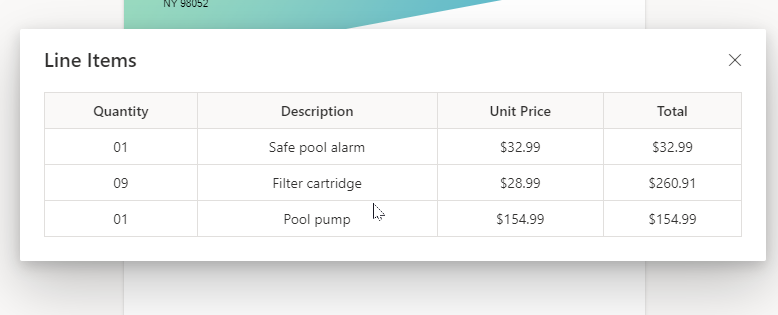
AI-Builder-Quick-Test-Table
While the quick test is useful, it’s time to publish the model and use it in a flow. Go ahead an click “Publish”. It takes a few seconds, sometimes a little longer, to publish the model. Once it’s published, the button changes and now says “Use model”.
