

Barret
Thursday, November 18, 2021 | 7 minutes
Creating a Custom Connector - Part I
Photo by Daria Shevtsova from Pexels
(NOTE: Posting to Twitter no longer works. Check my YouTube channel for videos on posting to Bluesky and Mastodon)
For those with the higher tier licenses, along with being able to use the premium connectors, you also have the ability to create your own custom connectors that you can use to connect to just about any API on the web.
For our fun project this time, we’re going to take the next two blog posts to create a custom connector that makes use of the NASA public APIs in order to grab the Astronomy Picture of the Day (APOD) and then we will create a flow that runs daily to post that day’s picture in a tweet to our Twitter feed.
Getting Started
The first thing we need to do is gather the needed information for the API we’re going to use. There are a couple of requirements for the APIs that can be implemented. First, the API must return a properly formatted JSON response object. No other return type is acceptable. Second, the API must support one of the supported security protocols, including OAuth 2.0, basic authentication and API keys. Non-secure APIs are also supported.
For the NASA public API, you sign up with an email address and you receive an API key in return. It also returns proper JSON objects, so we’re all set.
In the main menu, under Data, select “Custom connectors”. This will open a screen that lists your custom connectors, if you have any. Otherwise, you’ll see a mostly blank screen that mentions your custom connectors “will live here”.
custom-connector-menu
In the top right corner is a button labeled “New custom connector”. Click on it to get started creating your connector.

custom-connector-new-connector
When you do, you’ll see that you have a number of options to help you get started. These options include starting with a blank slate, or importing from a number of potential sources such as OpenAPI (formerly Swagger), a Postman collection or Github. For now, we’re just going to select “Create from blank”.
First, we’ll give our connector a name: I’m gonna call it “My NASA API Connector”. Original, I know. Once you give it a name, you’ll be led into a wizard that will walk you through creating your connector.
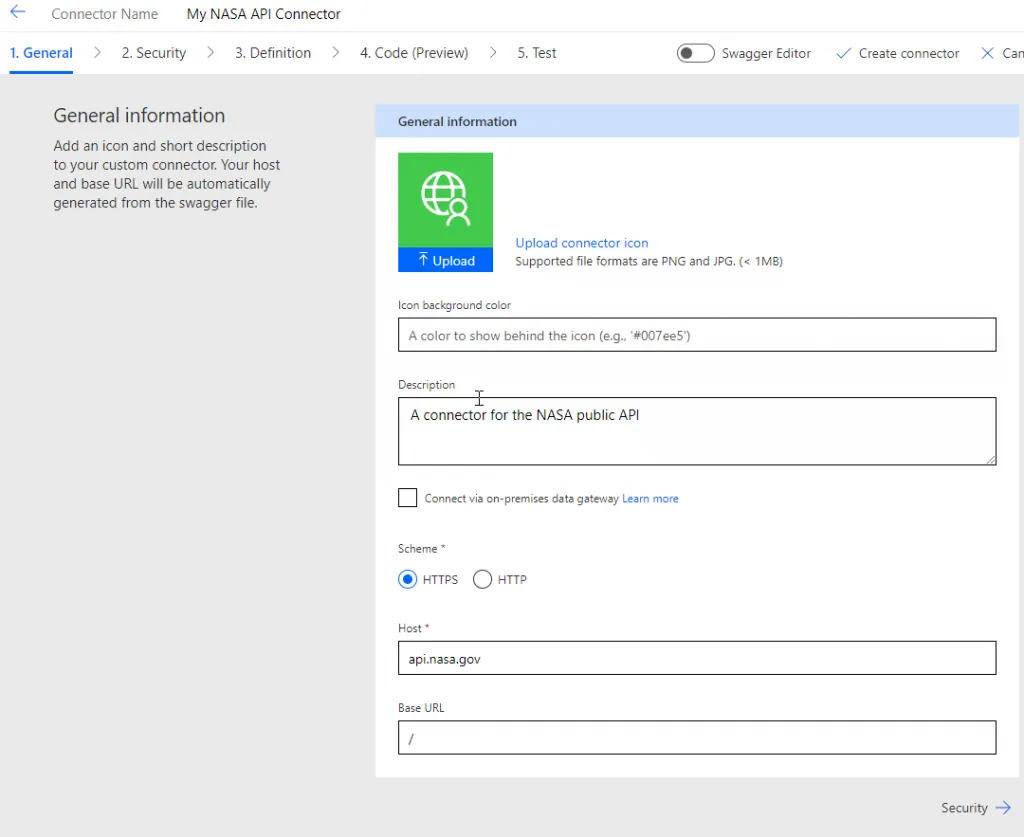
General Information
The first step is providing a bit of general information. You can provide a custom icon and description and provide the base URL information. Once you’re satisfied with the general setup, go ahead and click “Security” at the bottom right to move on to the next step.
custom-connector-wizard-general
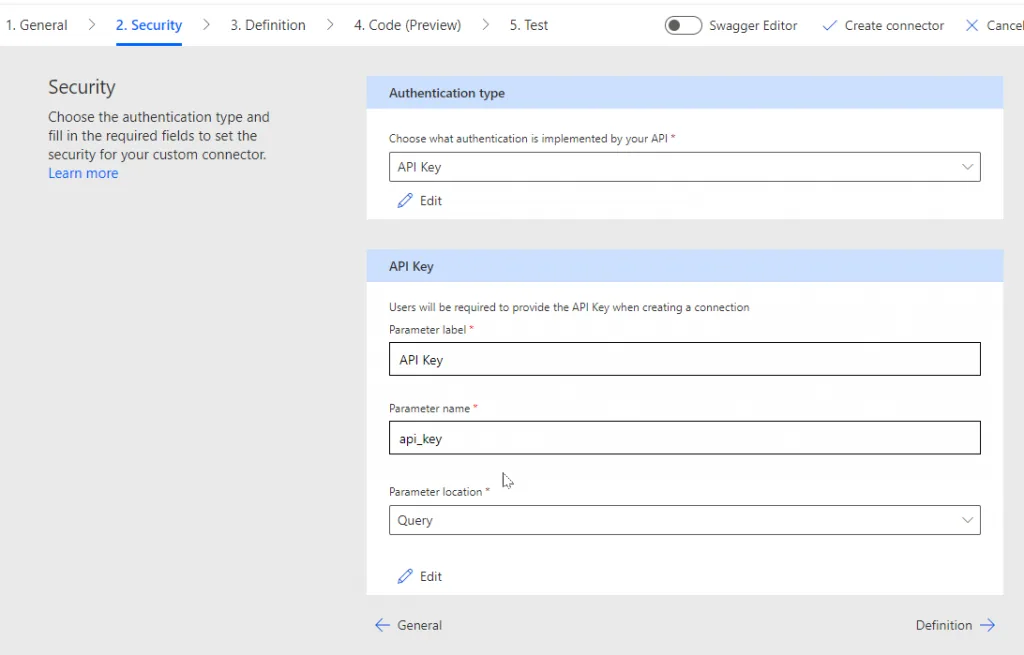
Security
On the security tab, you will define the security type. For our NASA API we will select “API Key” as our authentication type. When you select the auth type, the lower half of this screen will change to allow you to enter key pieces of information. For API Key auth, you will be asked to provide a “Parameter label” (what’s displayed to the user adding this connector to their flow), the “Parameter name”, the key name that’s passed in the API calls, and whether the parameter is passed in the Header or in the Query.
What you provide for the second two values depends on how the API requires that you pass the authentication information. In the case of the NASA API, they require that you pass a key named “api_key” in the query. So we will set up our information as follows.
custom-connector-wizard-security
Once you have set up your security as required by your API, click “Definition” to continue.
Definition
Because we selected to create from blank, this page will be empty. If we had used an OpenAPI file or something else to build our connector from, you would see some actions already defined here. For this sample, we’re just going to manually add the one endpoint we need for our flow. Click “New action” to continue.
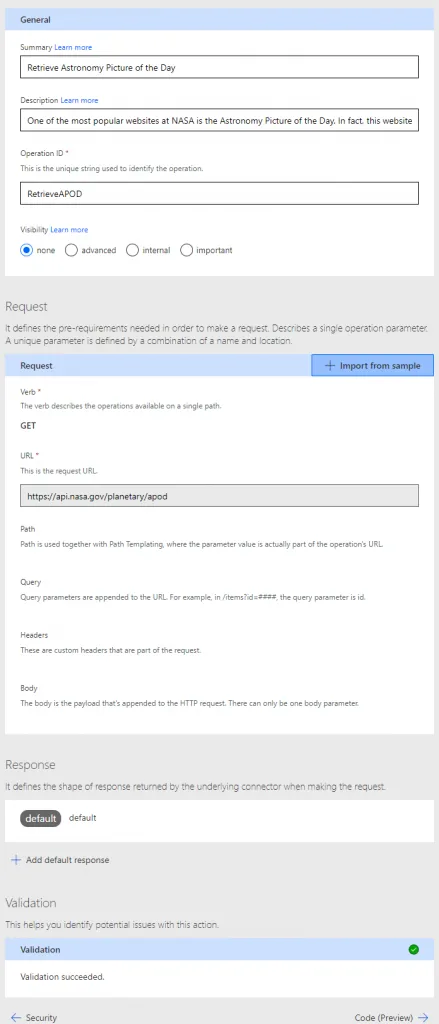
You see a form with a number of fields to be completed. At the top is one named “Summary”. This will be the title of the action that appears when the action is searched for or appears in the flow design surface. We’ll call our action “Retrieve Astronomy Picture of the Day”.
The next field is “Description”. Description allows you to provide a more verbose description of the action. This is what appears when a user hovers over the information icon at the top right of an action on the flow design surface.
The third field is “Operation ID”. This can be whatever you wish. However, it must be alphanumeric characters only, no spaces or special characters. And it must be unique within your connector. We’ll go ahead an call ours “RetrieveAPOD”.
Leave “Visibility” set to none. For actions that require parameters, this helps define what parameters are visible in the configuration and which are hidden in an “advanced” dropdown and which are hidden entirely from the user.
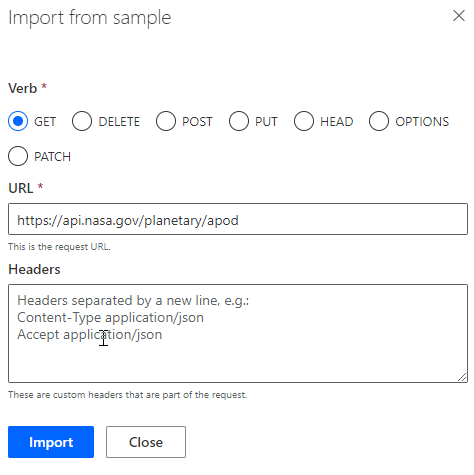
Next, we’ll define the Request for our API endpoint. Under Request click on “Import from sample”. A side menu will pop in from the right. Here is where you will define information about the endpoint you’re calling.
For our APOD call, there are no parameters or special headers to be passed. For “Verb” we’ll select “GET”. And for URL, we’ll enter the full API endpoint URL. Click “Import” to finish defining the Request.
custom-connector-wizard-request-import
Next we’ll need to define the response. You can have multiple response types defined, but you must at least define a default response. The easiest way to do that is to provide a sample of JSON that would be returned from the endpoint. Click on “Add default response” to get started.
Another popup will appear to the right. Into the second box, labeled “Body”, paste in the JSON sample and click “Import”. If you don’t have a sample JSON response, you can manually type in the JSON structure of the response.
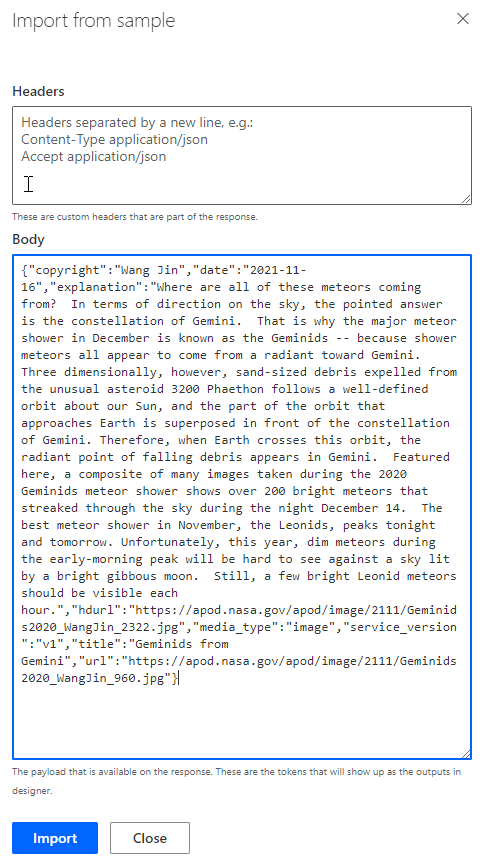
custom-connector-wizard-response-import
The Definition tab of the wizard won’t really have appeared to have changed, but if you now click on the “default” button below “Response”, it will open up box that will give you the option to rename the response and you can see the fields defined in the response body show up on the screen.
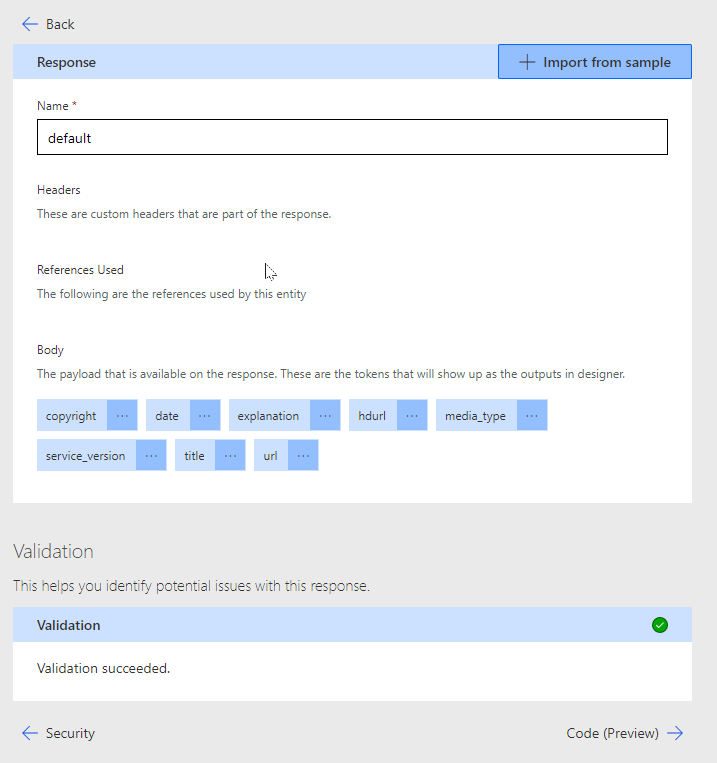
custom-connector-wizard-response-with-body
As you can see, we have several values returned in the body, including copyright, date, explanation, url and so forth. These are the values that will be usable within our flow.
As we are finished adding Actions for this connector, we can go ahead and move to the next step of the wizard. Our final Definition page will look something like this:
custom-connector-wizard-final-definition
Wrap Up Creation
Go ahead an click on “Code” at the bottom right to move to the next step.
The next page provides the ability to add custom C# code. This feature is in preview and you can’t add anything too complex at this time. But it does allow you the chance to have some custom code to modify your requests and responses as part of your API calls. We’ll leave this as is and click on “Test” at the bottom right.
The first time here the screen will be blank and you will see a message stating something to the effect of “You must create the custom connector before testing”. Now that your connector is defined, we need to generate it. At the top right is a button labeled “Create connector”. Go ahead and click it.
This will generate your connector and save it. After a couple of moments, you will see a list of the actions that you defined. And at the top will be a box to create your connection. Before you can test, you must have at least one connection for your connector created.
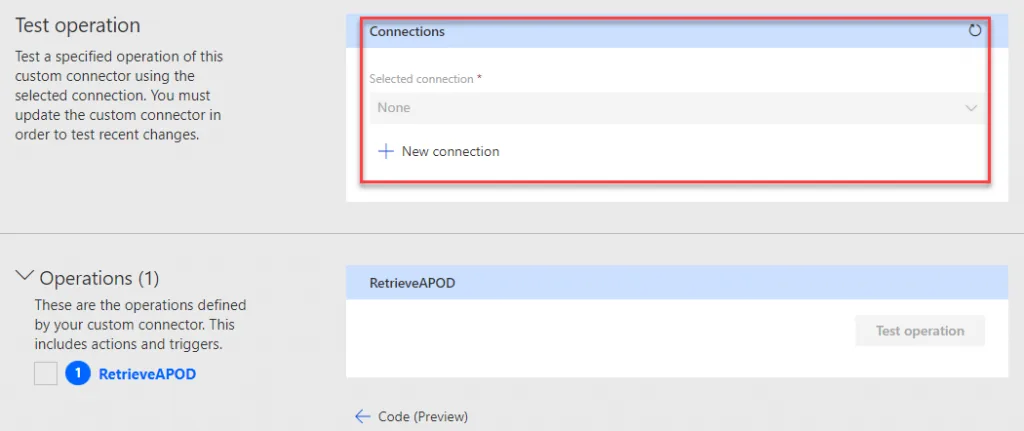
custom-connector-wizard-test-connection
Click on “New connection”. You’ll see a box asking for your API key. Paste or type your key in the box and click “Create connection”. If the connector you created doesn’t appear in the connections box, click the little refresh icon at the top right and it should appear.
Once it does, you should see that the “Test operation” button next to our RetrieveAPOD action is now clickable. Go ahead and click it. If there were no errors, you should now see the results of an API call.

custom-connector-wizard-test-result
Conclusion
That’s it! We now have a functional custom connector. Next time I’ll create a flow that implements the custom connector and posts the daily picture to Twitter.
