
Barret
Saturday, November 17, 2018 | 7 minutes
Using Microsoft Flow to Promote A New Ghost Blogging Platform Post
UPDATE: I’ve since abandoned Ghost and gone back to WordPress, but the concepts here apply equally and the Flow will actually work without any modifications for WordPress blogs.
(NOTE: Posting to Twitter no longer works. Check my YouTube channel for videos on posting to Bluesky and Mastodon)
Flow is Microsoft’s answer to IFTTT and Zapier and similar services. These services automate certain online tasks based on various triggers. In the case we’re examining today, we’re going to automate the following requirement:
When a new blog post goes live on my site, which is powered by the Ghost blogging platform, I want to create posts about it on Twitter and LinkedIn.
Connectors
Flow currently allows you to connect your Flows to over 200 external connectors. Many of them are included in the Free tier. Others are marked as premium and require a paid subscription to implement.
Pretty much any Microsoft online product is included with the standard connectors. A few of the other standard connectors include Dropbox, Asana, Basecamp, Bitly, Disqus, Campfire, Facebook, Gmail, GitHub, Freshdesk, LinkedIn and Pinterest.
Some of the Premium connectors include Adobe Creative, SalesForce, Oracle Database, ServiceNow, SurveyMonkey, Teradata, Zendesk, Bitbucket, JIRA, Leankit, GoToMeeting and Amazon Redshift.
Setup
The first piece of this task is setting up all of your accounts. If you already have a Microsoft account, then you’re all set. For the base level of Flow, there is no cost. It allows up to 2000 runs per month and access to all the standard connectors. This is the tier we’re going to select. Go to the Flow main page and create your account, selecting the free tier.
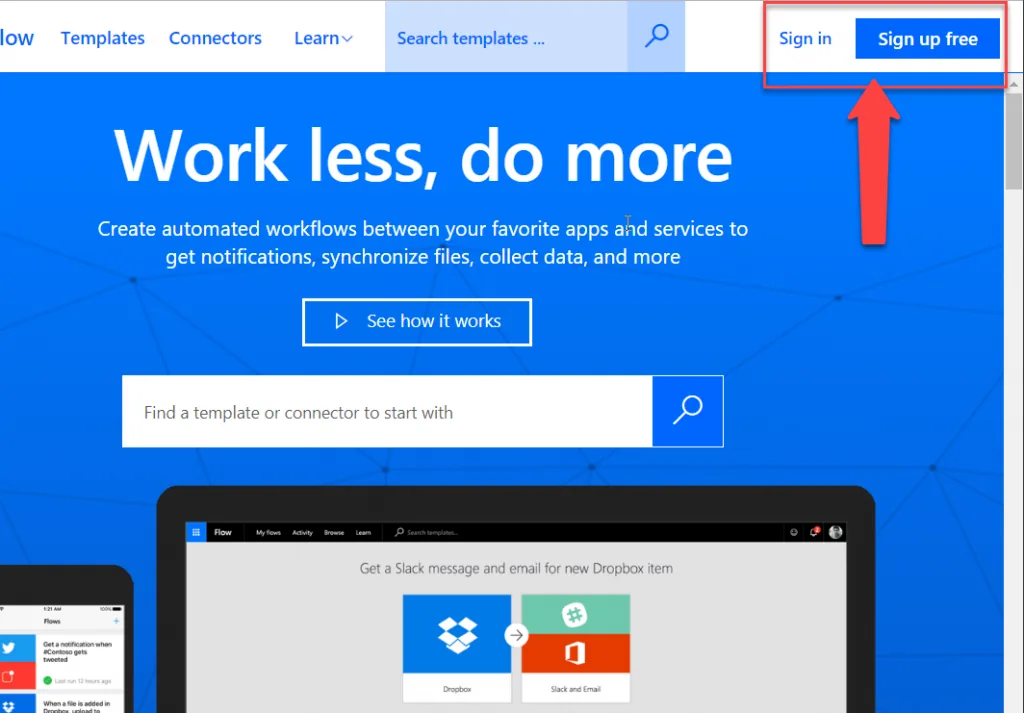
Power Automate Sign up/Sign in
If you want to create Flows that run often, or that use any of the premium connectors, you’ll have to use one of the paid tiers. With the paid tiers, you can also create custom connectors to just about any secured JSON based REST API endpoint.
We’re also going to assume that you’ve already created your various social media accounts. Have your account information handy as when you create the new flow, you’ll need to authorize to each of those accounts as part of the creation process.
From your blog, you will need to get the URL of the RSS feed. It should be something like https:///rss/. If you don’t know, click the RSS feed icon on your blog’s main page. It will give you a link like:
https://feedly.com/i/subscription/feed/https://barretblake.com/rss/
That’s designed for the Feedly app. Your site’s actual rss is the last part of that after the ‘/feed/’ segment. In my site’s case it’s https://barretblake.com/rss/.
Starting Templates
Flow includes a wide variety of predefined templates you can use as a starting point. While Flow doesn’t currently include any templates based on the Ghost blogging engine API, it does have templates for RSS feeds. That’s what we’re going to use here.
In the search box on the Flow home page, type ‘RSS’ and hit enter. Look through the list of templates for one of the titles that start ‘When an RSS feed item is published…’. Feel free to look at them. We’re going to create ours from scratch, but these will give you a decent idea of the end result.
Now, an important note about posting to Facebook. Facebook recently changed their API policies. It is no longer permitted to post to a person’s Timeline via the API. If you’re an admin on a Facebook Page, you can post to that Page. But you can’t post to a Timeline. I don’t know why they changed it. Maybe they hate external developers as much as Twitter. Who knows?
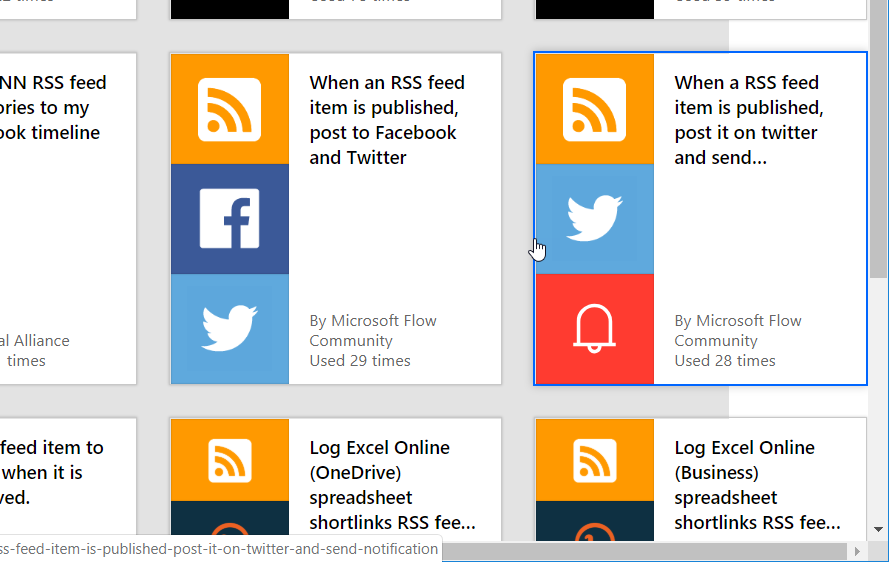
Power Automate templates
Creating Our Flow
Once you’re done looking at the pre-defined templates, discard whatever you did and return to the My Flows screen. We’re going to create our Flow from scratch. Select New -> Create from blank on the menu.
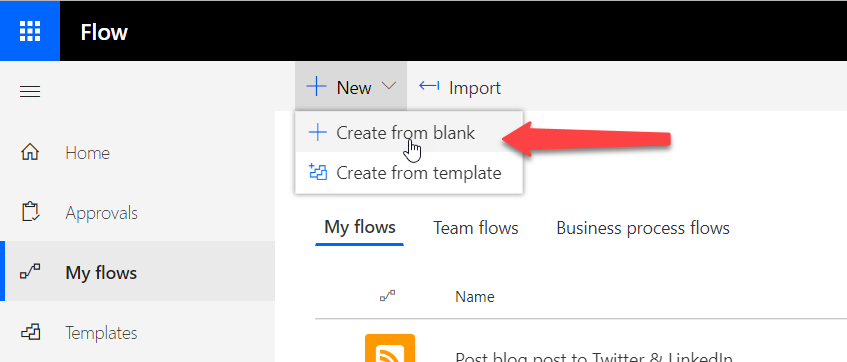
Creating a flow from scratch
You’ll be presented with the create a blank Flow dialogue. The first part of creating the Flow is selecting what triggers the Flow to start. In our case, we want the trigger that is titled “When a feed item is published”. It may appear in the block of popular triggers, or you may need to search for it. If you need to search, enter RSS in the search box and you should see that option listed. Select it.
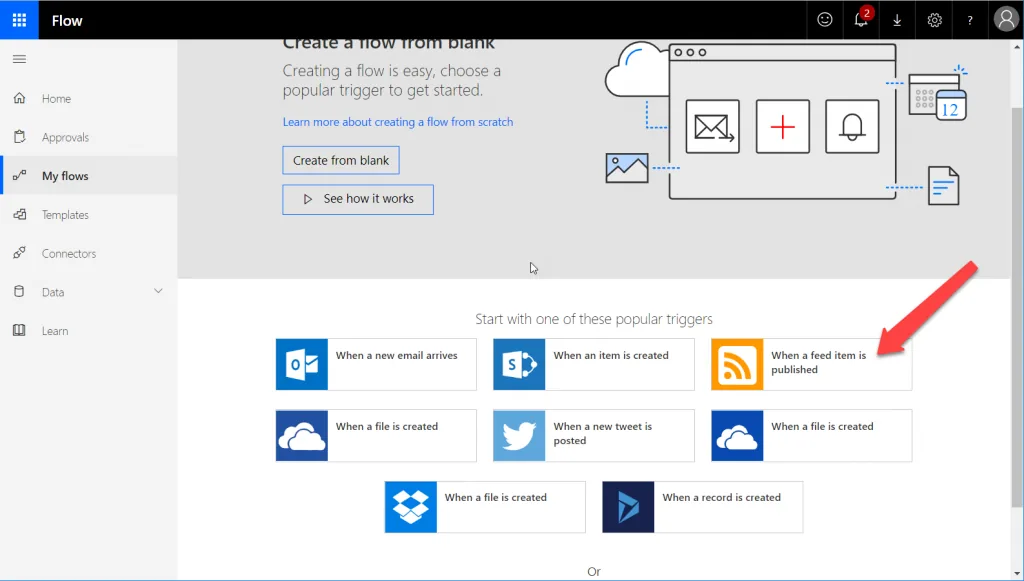
RSS feed trigger
Configure
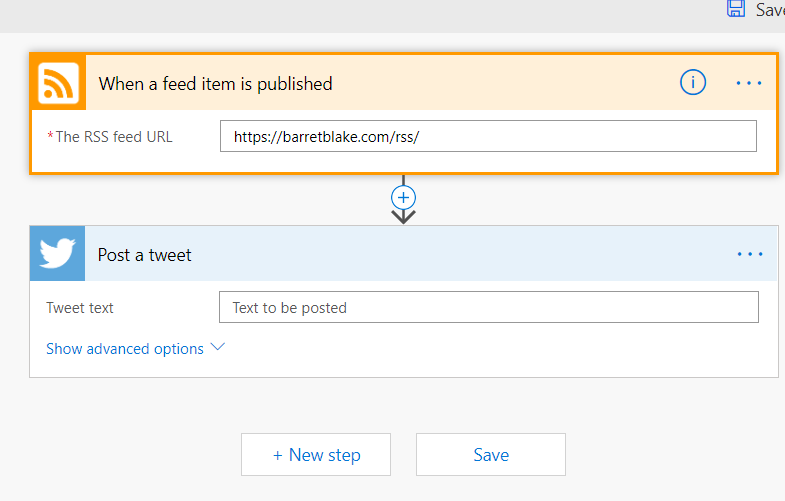
You will next be shown a screen where you will add and configure the various steps of the Flow. You should see a box to enter the URL of the RSS feed. Put the URL you grabbed earlier in the box. Then just below it, click ‘New Step’. You will probably see the option for Twitter in the top box. If not, enter Twitter in the ‘Search connectors…’ box. When you find and click on Twitter, you will see a list of possible actions you can take. Select ‘Post a tweet’. If you have not connected Flow to Twitter previously, you will be asked to enter your Twitter credentials and authorize Flow to post to Twitter on your behalf.
(NOTE: Posting to Twitter no longer works. Check my YouTube channel for videos on posting to Bluesky and Mastodon)
Tweet action
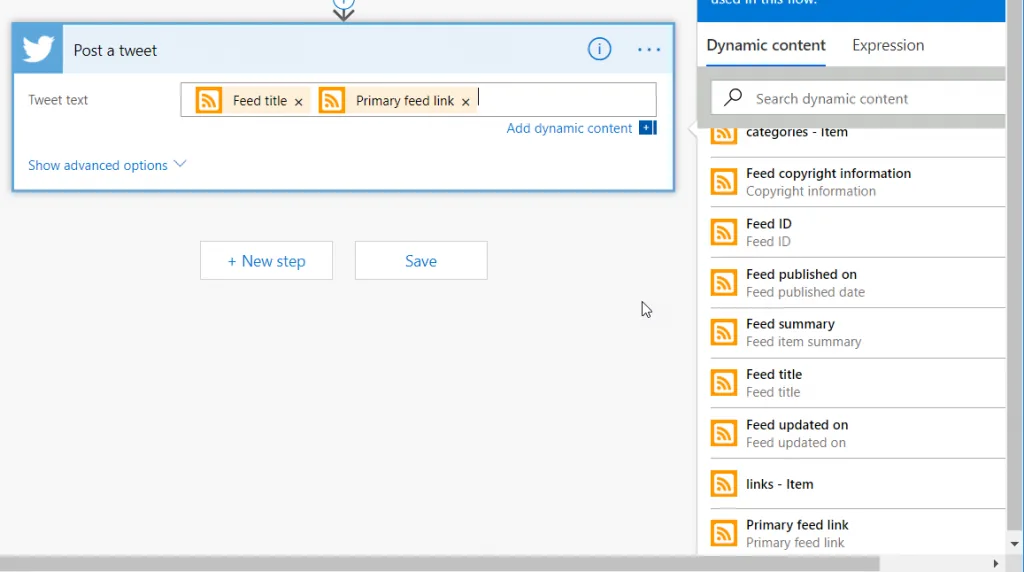
Now here’s the part where working with RSS feeds in Flow is a little confusing. Click inside the “Text to be posted” box. You will see a list of options for pre-defined values appear to the right. In the list of pre-defined options derived from your RSS feed, you’ll see several items like “Feed title”, “Feed summary” and “Primary feed link”. These are actually referencing your new blog post, the newest item in your feed, and not the RSS feed itself. The wording can be confusing. For our tweet, we simply want the “Feed title” and “Primary feed link” fields. Select those two entries and they will appear in the box.
Define the tweet
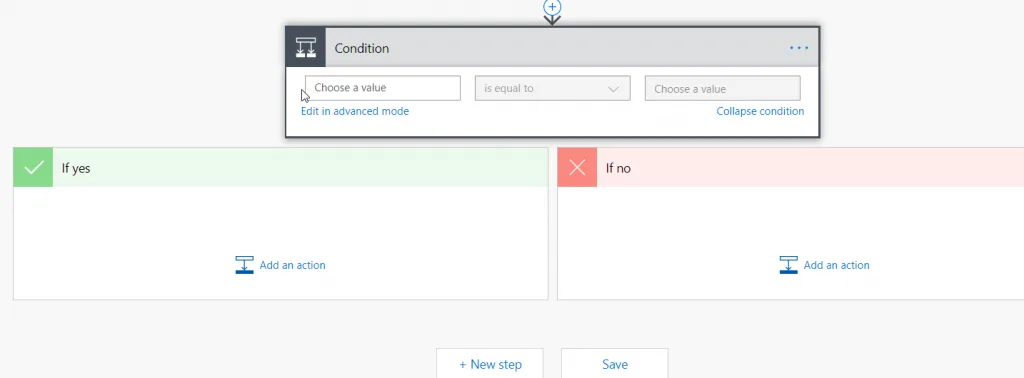
Now, let’s add a little twist. We want to create a tweet for every blog post, but we only want blog posts with a certain tag to be posted to LinkedIn. So the first thing we need to do is create a branching path. Click “New Step” below the “Post a tweet” box. In the actions list, look for an entry titled “Condition” and select it. This will create our branching structure.
Check for hashtag
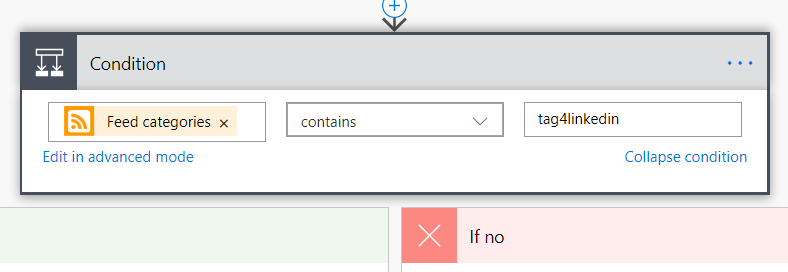
Now we need to define our condition. In the “Condition” box, click in the box that says “Choose a value”. From the list that appears to the right, select “Feed categories”. This is a value that represents an array of the categories for that blog post. In the middle box, select “contains”. In the box on the right, enter the value of the tag you are looking for. This is, I believe, a case sensitive value. But I could be wrong.
Define the condition
Now, in the “If yes” box, click “Add an action”. In the actions box, you’ll need to search for LinkedIn. In the LinkedIn actions list, select “Share an article”.
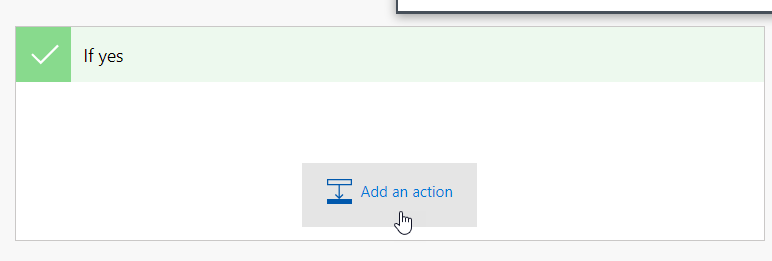
Add a new action
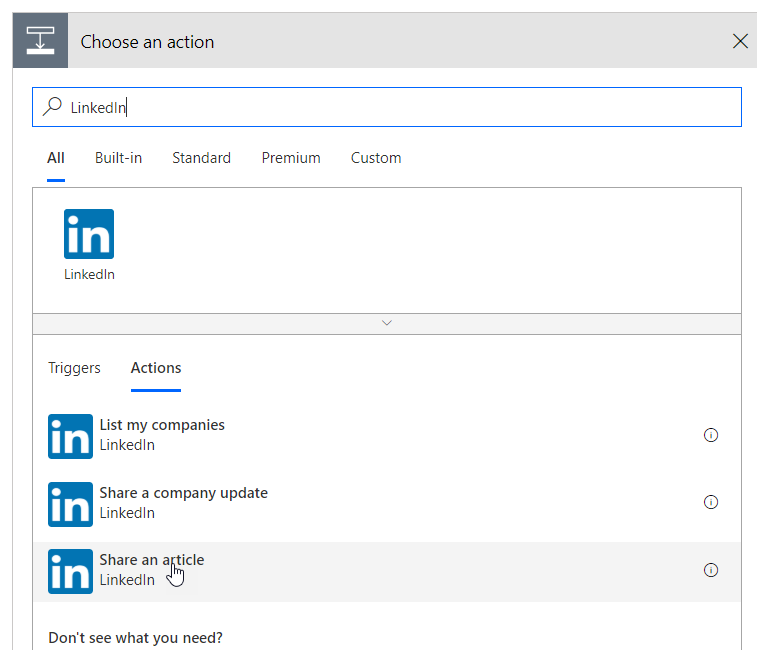
Post to LInkedIn
Again, if you haven’t connected Flow to LinkedIn, you’ll need to enter your credentials and authorize it. This action has two required fields. For the “Content URL”, click in the box and select “Primary feed link” from the options. For “Visibility”, select either “anyone” or “connections-only”, depending on who you want to be able to see it. You can click the Advanced Options and specify other details, but they aren’t necessary. LinkedIn is pretty good at parsing your blog post for what it needs.
Fin
And that’s it! You’ve created your Flow. Next time, I’ll show you how to insert a Bit.ly task to convert your blog post link to a short URL to help keep you tweet from being too many characters.
